How to Draw a Teapot in Watercolor: A Step by Step Guide
Learn how to draw a teapot in loose ink and watercolor with a clear nine-stage method covering the body ellipse, spout, handle, lid, and soft washes.
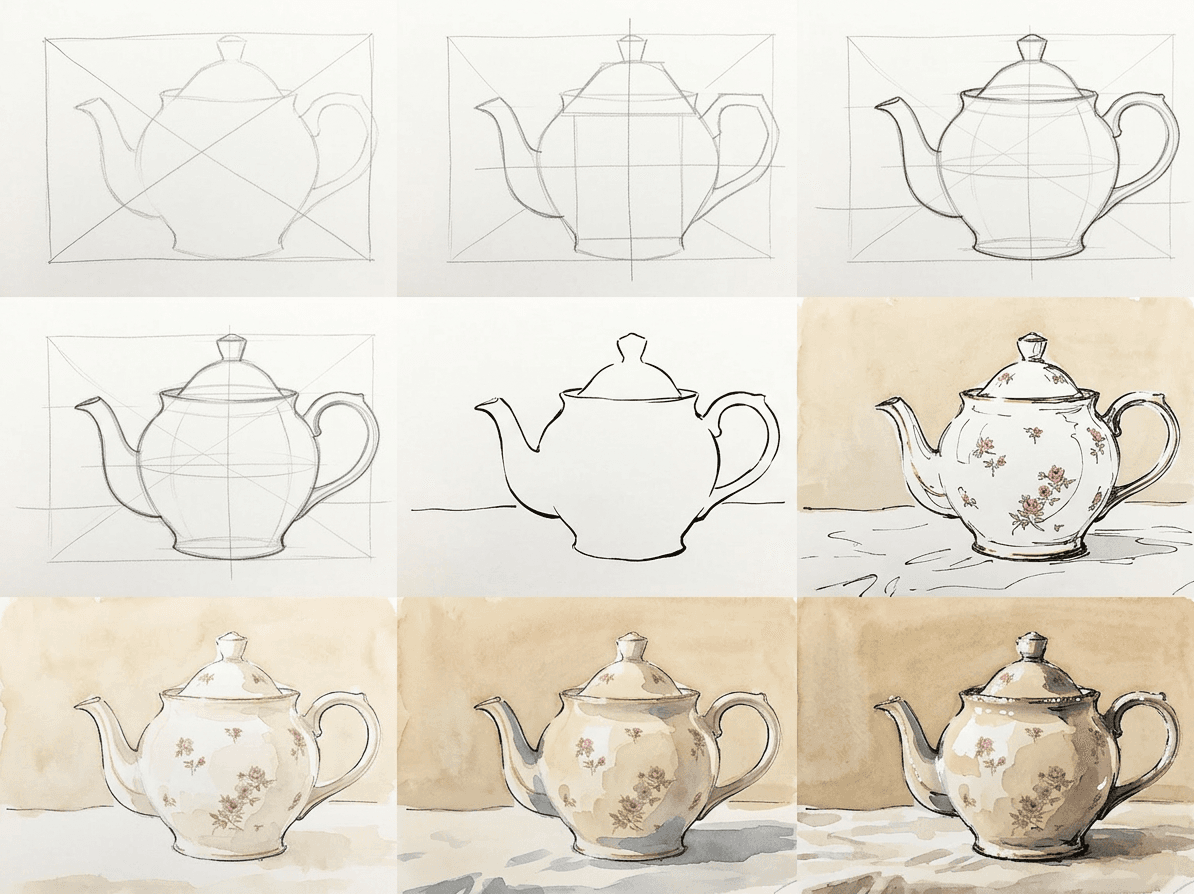
Learning how to draw a teapot is one of the friendliest ways into still life. A teapot gives you a round body, a curved spout, a looping handle, and a small lid, so you practice ellipses, symmetry, and smooth curves all in one object. In this loose ink and wash still life, you will build a vintage porcelain teapot across nine clear stages, from a light pencil box to gentle watercolor washes and a few inked accents. Nothing here needs steady-hand magic, only patience and a willingness to check your shapes before you commit.
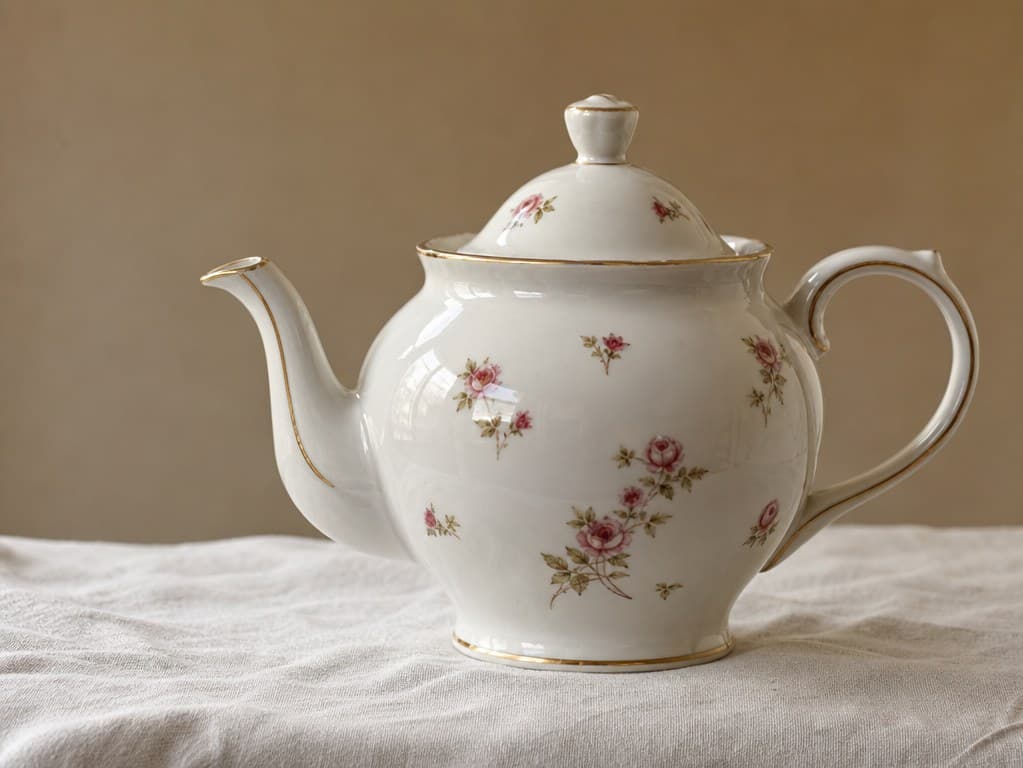
What you will need
You need very little to start. A single HB pencil handles the whole layout stage, and a softer 2B helps if you want darker guide lines before you ink. Use smooth or hot-pressed watercolor paper around 200 gsm so the washes sit flat and the ink stays crisp. A kneaded eraser lifts pencil cleanly without bruising the surface, which matters once you start floating pale color over the same area. Keep a scrap of the same paper beside you so you can test each wash before it goes anywhere near the teapot.
For the ink, a 0.3 or 0.5 fineliner gives a steady outline, and a slightly broader pen helps with the darker accents at the end. Two or three watercolor pans cover this easy still life painting: a warm grey, a soft ochre, and a muted rose for the flowers. One round brush, size 6 or 8, does both the broad washes and the fine shadow shapes, so you do not need a full kit to follow along. A jar of clean water and a paper towel for blotting round out the small pile of tools.
Why we break this into nine stages
This teapot watercolor tutorial uses a nine-stage method that keeps you from drawing detail too early. You start with a loose envelope, settle the big proportions, then refine the curves before a single drop of ink touches the paper. Each stage fixes one kind of problem, so a wobbly spout or a tilted lid gets caught while it is still a faint pencil line. By the time you reach color, the structure is already sound, and the washes only have to add light and depth. It also makes the work feel less daunting, because you are only ever solving one small puzzle at a time.
Drawing the teapot stage by stage
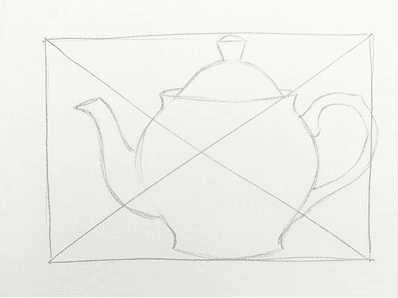
Begin by drawing the overall envelope. Sketch a light rectangle a little wider than it is tall, then add a vertical center line and a horizontal line for the widest part of the belly. Rough in the teapot silhouette inside the box so you can see that the whole shape fits with room to spare. A teapot sits a little below the middle of its box, so leave slightly more space above the lid than below the foot.
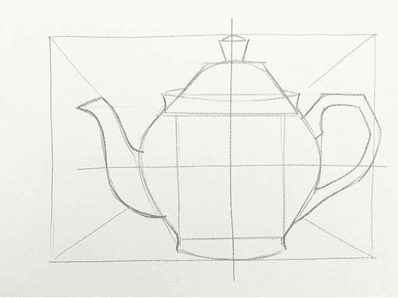
Next, block in the axis and the main sub-shapes. Draw the belly as a squat oval, sit a shallow dome on top for the lid, then add a triangle for the spout and a loop for the handle. Keep every mark loose and light, since these are placeholders you will tighten in a moment, not finished edges. The spout usually starts a little above the widest point of the belly, not down at the very bottom.
Now refine the proportions and the ellipse axes. The lid opening and the foot are both ellipses, and their long axes should stay parallel to each other. Check that the belly is widest at about a third of the way up rather than in the dead center, which is what gives a teapot its settled, bottom-heavy stance.
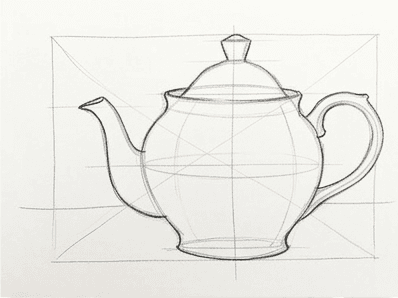
With the proportions set, draw accurate curves. Replace your scratchy guide lines with single confident strokes. The spout reads as a soft S, the handle as a smooth open loop, and the belly as one continuous arc that runs from the lid down to the foot without any flat spots. If a curve fights you, turn the paper so your hand pulls the stroke toward you instead of pushing it away.
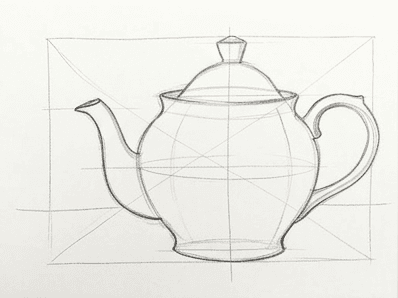
Erase the spare pencil and ink the outline. Wait until the structure genuinely feels right, then trace the main silhouette with your fineliner. Vary the pressure so the line sits slightly heavier on the underside of the belly and stays lighter along the lit top edge, which already hints at where the light falls.
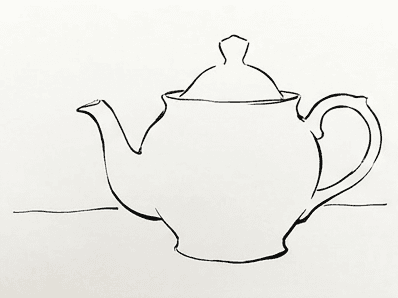
Ink the shadow outlines. Add light lines where the cast shadow meets the table and where the lid seats into the body. These quiet marks tell the later washes exactly where to start and stop, which is what keeps loose color from wandering across the white porcelain.
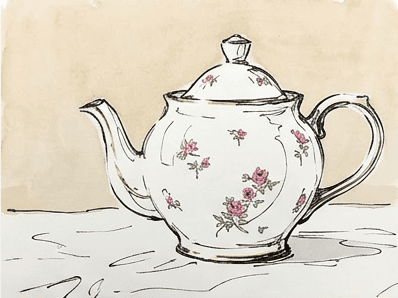
Lay the palest wash. Mix a very dilute warm grey and float it over the shadow side of the body, the underside of the spout, and the inside of the handle. Leave the brightest part of the belly as bare paper, because that untouched white is the highlight that will make the porcelain look glazed. Tilt the board a touch so the wash settles toward the shadow and pools where you want it darkest.
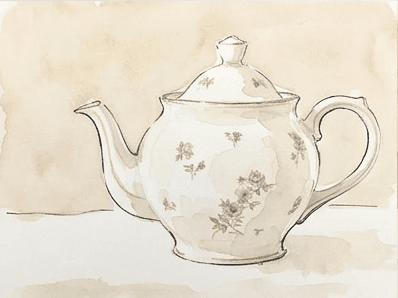
Add the mid-tone shadow washes. Once the first layer dries, build a second, stronger wash into the core shadows, then drop in the soft rose and ochre of the floral pattern. A loose background wash behind the teapot anchors it to the table and stops the white body from floating on the page.
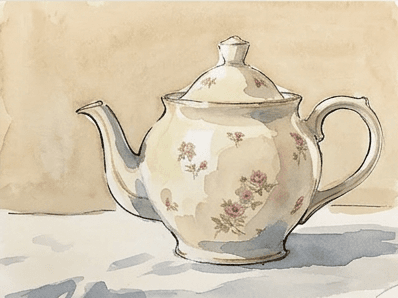
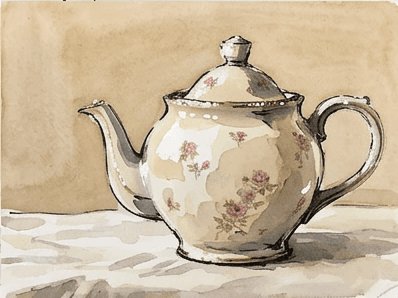
Deepen the shadows with ink accents. Use your broader pen or a dark wash for the narrow contact shadow under the foot, the gap beneath the lid, and the darkest curve where the handle turns away from the light. These small, deliberate darks are what finally give the teapot its weight and roundness.
Common mistakes
A few errors show up again and again with this subject, and each one has a simple fix. Spot them early and the rest of the drawing falls into place. None of them mean you have to start the page over.
- Lopsided ellipses: if the lid or foot looks like a pointed eye, your ellipse axis is off. Redraw it as a full, rounded oval and keep its long axis level.
- A drooping spout: beginners often hang the spout too low. Lift its tip back up toward the height of the lid so the pour line stays believable.
- Muddy washes: stirring wet color too much lifts the layer below. Lay a wash, leave it alone, and wait for a dry surface before the next pass.
- Lost highlights: if the whole body turns grey, you painted over your white. Plan the brightest spot first and paint around it from the very start.
- Flat outlines: a uniform thick line looks lifeless. Vary the weight so the shadow side reads heavier than the lit edge.
Practice prompts
Once your first teapot feels solid, repeat the workflow with small changes to lock in the skill. Try the same teapot from a straight-on view so the ellipses flatten and the symmetry gets stricter. Then draw a kettle step by step instead, swapping the squat body for a taller metal form with a different handle and a longer spout. For a third pass, set the teapot near a window in late afternoon and push the shadow longer and warmer to see how light changes the mood. If you have one, add a matching cup and saucer beside it and practice keeping their ellipses consistent with the pot.
Drawing a teapot rewards patience more than talent. The shape is forgiving, the washes are simple, and every stage gives you one clear thing to check before you move on. Run through these nine steps a few times and the curves will start to feel automatic. If you want this same stage by stage workflow built from your own photos, the Learn to Draw app on iOS and Android turns any reference into a guided grid you can follow at your own pace.

