How to Draw a Runner in Pencil: A Step by Step Guide
Learn how to draw a runner in pencil with a clear nine-stage method that captures a mid-stride action pose, from armature lines to final shading.
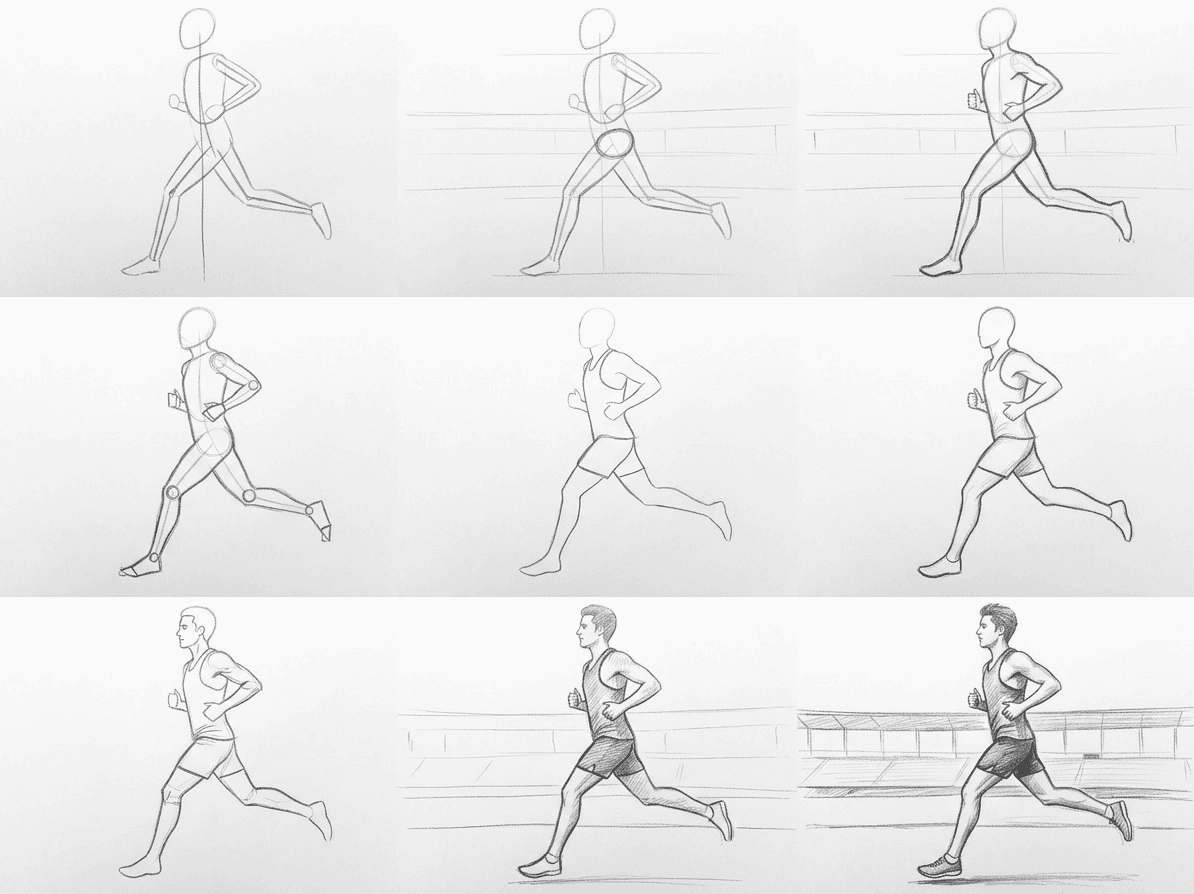
Learning how to draw a runner means catching motion inside a still pose, and that is easier than it looks once you work in stages. This pencil tutorial breaks a mid-stride sprinter into nine clear steps, starting with a simple stick armature and finishing with shadow and detail. You will track the same reference photo the whole way, so every line has a reason. By the end you will have a confident athletic figure that reads as fast even though it sits quietly on the page.

What you will need
You do not need much for a runner pencil drawing. An HB pencil handles the light armature and guide lines without digging grooves into the paper. A 2B and a 4B give you the mid and dark values for muscle shadow and the cast shadow on the track. Keep a kneaded eraser for lifting guide lines and a firmer vinyl eraser for crisp edges.
Use smooth or lightly toothed paper around ninety to one hundred gsm so graphite blends cleanly. Tape the sheet down at a slight angle and slide a scrap sheet under your hand to stop smudging. Keep your reference printed or on a second screen at the same orientation as your page, which saves you from flipping the pose by accident.
Why we break this into nine stages
A running figure carries weight, balance, and stretch all at once, which overwhelms most beginners who start with the outline. The construction-line method fixes that. You build the pose from the inside out, locking the action and the proportion before you commit to a single contour. Each of the nine stages adds one layer of decision, so a mistake in the legs shows up while it is still two erasable lines, not after you have shaded a whole shoe. This is the same draw a person running step by step logic that figure classes use.
Drawing the runner stage by stage
Work through the grid one cell at a time. Each panel below adds a single layer, so finish one before you move on and your figure will hold together from the first stroke to the last.
Start with the line of action, a single curving stroke from the head down through the spine and into the supporting leg. Add stick lines for the arms and the trailing leg. Keep everything light. This armature is the engine of the pose, so confirm that the forward lean and the long stride read as a real sprint before you add anything else.
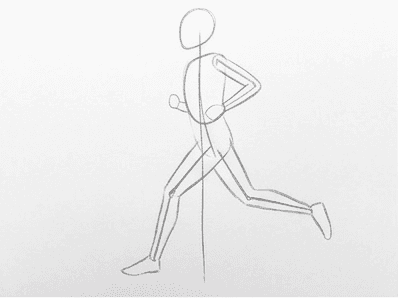
Drop in an oval for the ribcage and a tilted wedge for the pelvis. Mark the halfway point of the body at the hip and rough in the head as an egg shape. These guides set proportion, roughly seven and a half head heights for an adult athlete. Tilt the pelvis to follow the raised trailing leg, since a level pelvis kills the sense of stride.
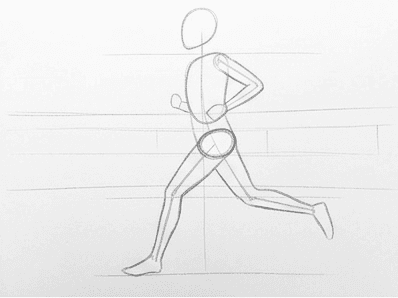
Now connect the armature into a continuous silhouette. Trace the thigh masses, the calves, the upper arms, and the taper of the waist as smooth tube shapes. Keep your lines loose and searching rather than hard. The goal is to find the outer edge of the whole athletic figure, not to finalize it. Watch the gap between the legs, which is the widest it will be at full stride.
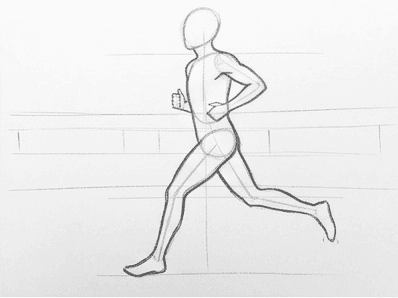
Pin down the joints next. Place small circles at the shoulders, elbows, knees, and ankles, then block the hands as soft mitts and the feet as wedges. The front foot reaches for the track while the back foot points off the ground behind. The ankle angles here are what sell the push-off. Spend an extra moment on the planted foot, since it carries the runner's full weight.
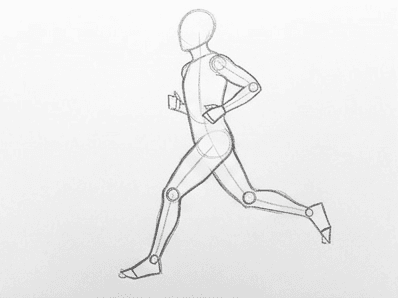
Lift the inner armature and the proportion guides with your kneaded eraser until only the clean body outline remains. Then lay in the tank top and shorts, following the curve of the torso and the angle of the hips. Fabric sits slightly off the body and lags behind the motion, so let the back hem of the shorts trail a touch. Keep the clothing lines lighter than the body edges for now.
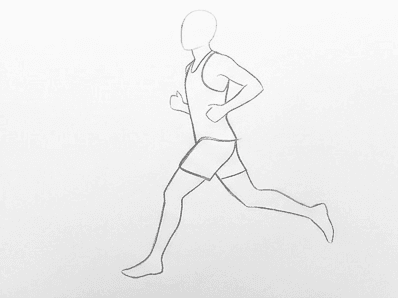
Refine the contour into one confident line. Where you had searching strokes, choose the truest edge and firm it up, then erase the rest. Smooth the transitions at the shoulders, the waist, and behind the knees. This is where the action pose drawing starts to look like a person rather than a diagram. Step back, or flip the page in your reference app, to catch any lopsided limb while the fix is still cheap.
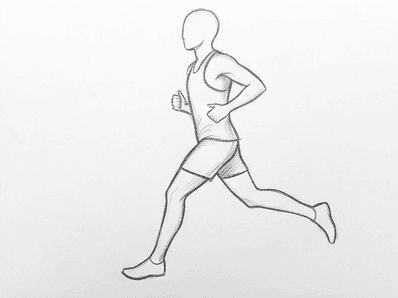
Bring in the smaller shapes. Indicate the brow, nose, and jaw in profile with a few short marks, and suggest the ear and the hairline. Add folds where the fabric bunches, at the hip crease of the shorts and across the lower back of the tank top. Keep the face simple. A sprinter seen from the side needs only a hint of feature to feel alive, so resist over-drawing the eye.
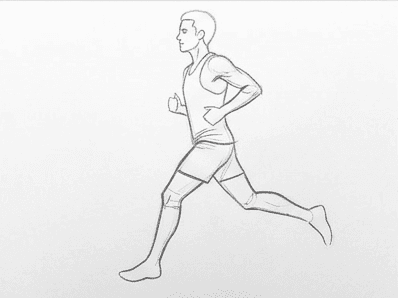
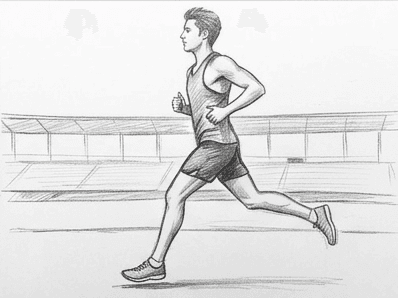
Decide where your light comes from, the soft morning light from the front in this reference, and shade the opposite planes. Use your 2B to lay a mid-tone on the underside of the arms, the back of the legs, and beneath the ribcage. Add the cast shadow on the track directly under the planted foot. Shading anchors the runner to the ground and turns flat shapes into rounded muscle.
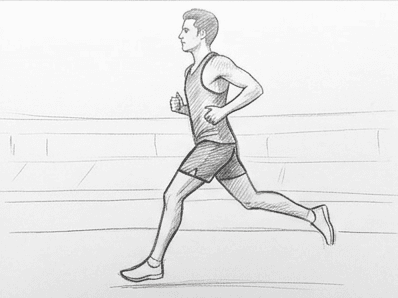
Finish with your darkest accents. Switch to a 4B and deepen the core shadows in the armpit, behind the knee, and inside the shorts. Sharpen the edges of the shoe and add a few lines for the track lanes behind the figure. Lift a couple of highlights on the shoulder and thigh with the kneaded eraser. These final contrasts give the drawing snap and make the muscles read as firm.
Common mistakes
A few errors show up again and again in a runner pencil drawing, and each has a quick fix. The first is a vertical spine. If your figure looks like it is jogging in place, you skipped the forward lean in stage one, so tilt the whole action line forward and the speed returns.
The second is matching limbs. Beginners often draw both arms bent the same way, but in a real stride the arms swing opposite the legs, so the forward arm pairs with the back leg. The third is flat feet. A runner rarely plants both feet, so keep the trailing foot lifted and angled and let only the lead foot meet the track.
The fourth is muddy shading. If your darks turn grey and lifeless, you pressed too hard too early with one pencil, so build value in light layers and save the 4B for the final accents. The fifth is a stiff outline. Hard, even lines flatten the muscle, so vary your line weight, heavier on the shadow side and lighter on the lit edge, to give the body real volume.
Practice prompts
Once this runner feels solid, repeat the workflow with a small change to lock the skill in. Try the same sprinter from a three-quarter front view so you wrestle with foreshortening in the near leg. Draw a runner at the moment both feet leave the ground, the full float phase, to test your sense of balance without a planted foot.
You can also switch the time of day to a low evening sun and rake the light across from one side, which throws longer cast shadows and stronger core darks. Each variation reuses the same nine-stage armature, so you spend your effort on the new problem instead of relearning the basics. This athletic figure tutorial carries over to cyclists, dancers, and footballers too.
Drawing a runner trains the two skills every figure needs, balance and gesture, in a single sitting. Keep this nine-stage path nearby and you can tackle almost any action pose with the same calm order. If you want this exact workflow on your own running photos, the Learn to Draw app for iOS and Android turns any picture into a guided step by step grid like the one here, so you can practice from the references that inspire you most.

