How to Draw a Barn in Watercolor: A Nine Step Guide
Learn how to draw a barn in loose ink and watercolor with a clear nine stage tutorial covering perspective, ink lines, and warm color washes.
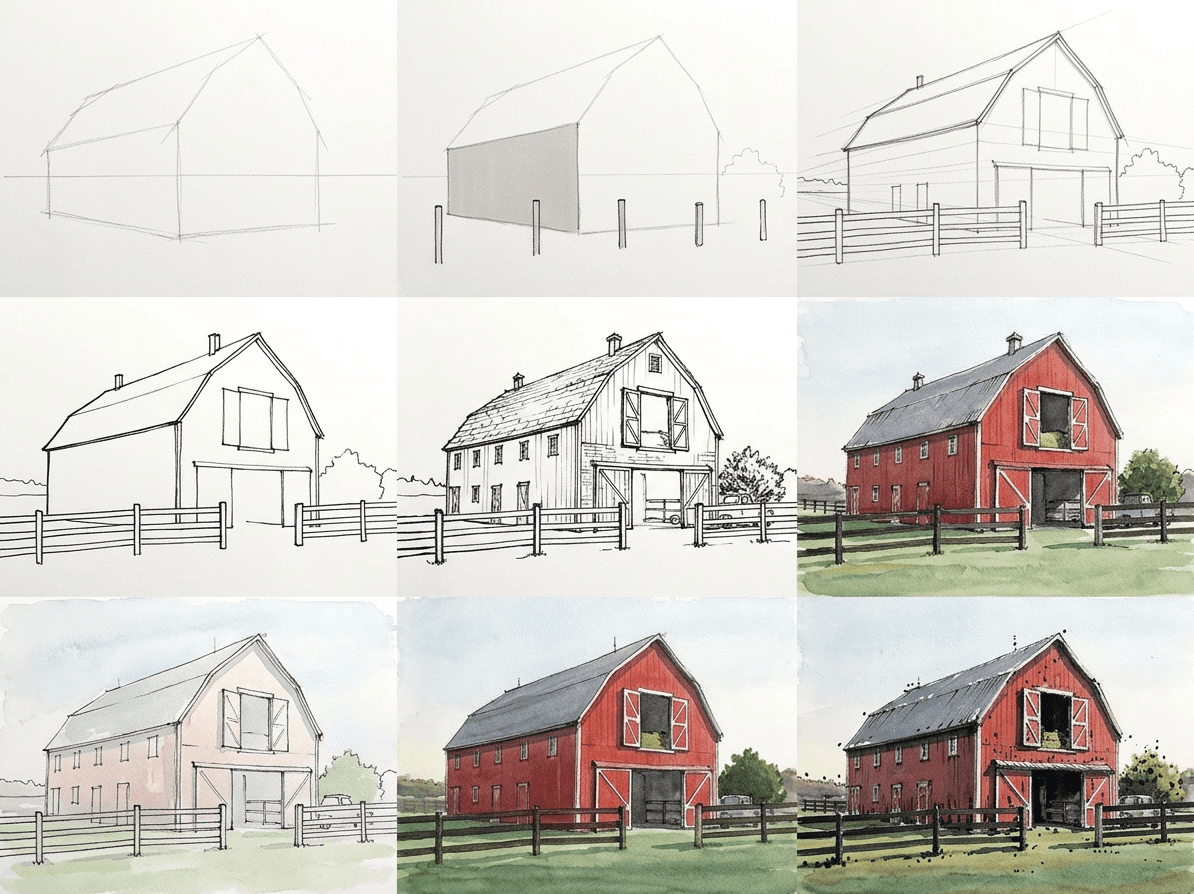
A red wooden barn is one of the best subjects for learning loose ink and watercolor. The shapes are simple, the colors are limited, and the textures forgive a brush that wanders a little. This barn watercolor tutorial walks you through how to draw a barn in nine clear stages, from a faint pencil envelope to the final wash. By the end you will have a small, confident sketch that looks like a place you could walk into.
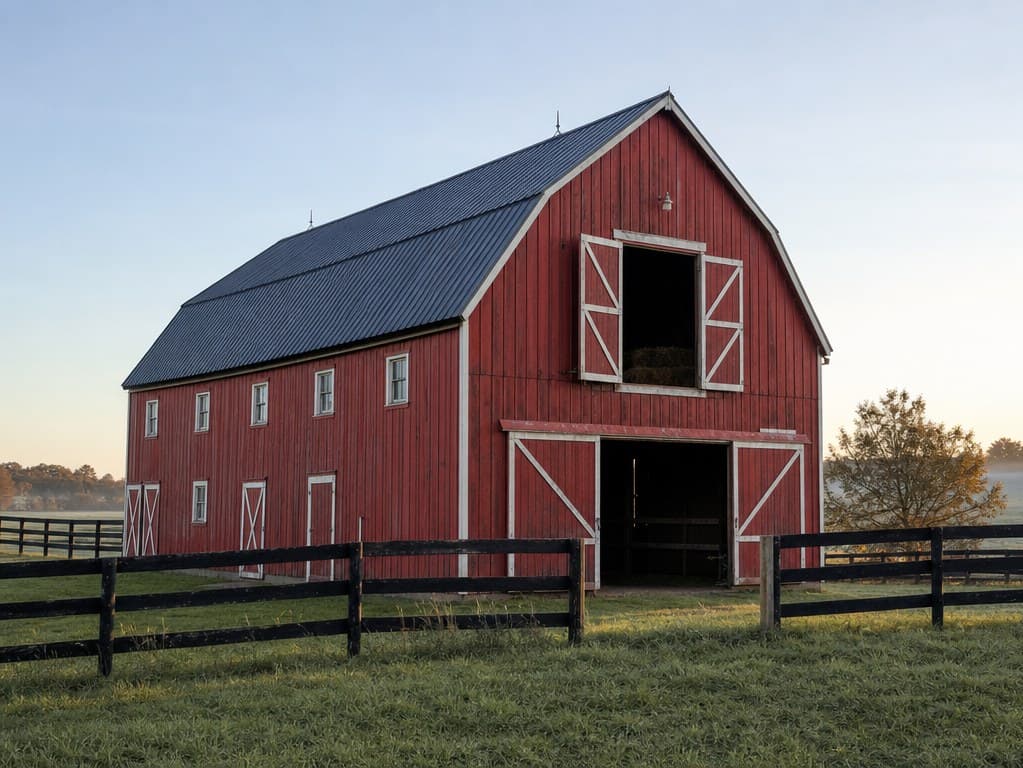
What you will need
A barn is a forgiving subject, so the kit can stay small. Reach for an HB pencil for the layout, a kneaded eraser, and a single sheet of cold press watercolor paper around 200 gsm. Heavier paper will not buckle when the washes sit. A piece of scrap paper to test colors before they hit the painting is worth its weight in saved patches.
For ink, a waterproof fineliner in 0.3 mm plus a 0.1 mm for small details covers everything you need. A pointed round brush in size 6 holds enough water for big sky washes and still keeps a clean tip for shadow strokes. Two pans of paint are enough to start: a warm earth red for the barn wall and a neutral grey for the roof and the cast shadows.
If you only have one brush and one pen, do not worry. The nine stage method works on a sketchpad with school supplies as well as it does on cotton paper. Make the work fit the tools you actually have today.
Why we break this into nine stages
Loose ink and wash architecture looks effortless because the artist made hundreds of small decisions before the brush touched the page. The nine stage method moves those decisions out of your head and onto the paper. Each stage isolates one thing, layout, line weight, or wash value, so you stop juggling all three at once. If a stage feels off, you fix it before the next one buries it.
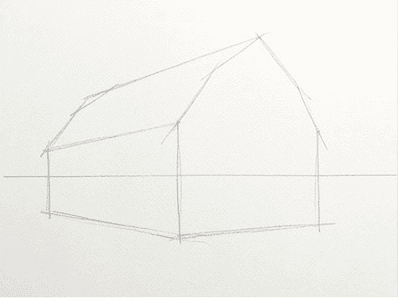
Stage 1: Sketch the horizon and envelope
Start with the lightest possible pencil pass. Find the horizon line first. In this reference it sits roughly two fifths of the way up, which keeps the sky generous without flattening the field. Box in the whole barn as one rectangular envelope. Resist drawing windows or boards yet. You want a shape you could read from across the room.
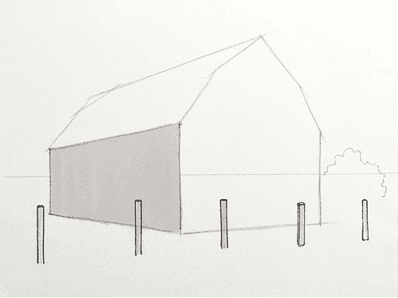
Stage 2: Block in the building masses
Slice the envelope into its big masses. The peaked roof becomes a triangle stacked on the rectangle of the walls. Sketch the gable end on the left as a flat plane, the long side wall as a foreshortened rectangle, and the hayloft as a smaller rectangle near the top. Keep all lines straight and unfussy. Boards and trim come later.
Stage 3: Add perspective guidelines
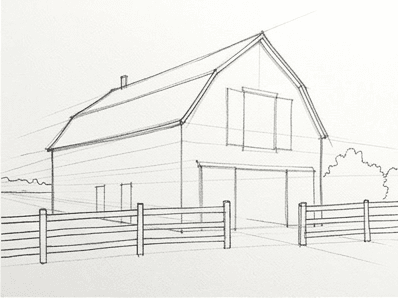
Pick a vanishing point on the horizon and run light guidelines back to it from each corner of the side wall. These lines decide every horizontal edge to come: the roof line, the board courses, the fence rails. A barn that looks crooked usually has good shapes but mismatched perspective. Lock the angles now and the rest of the drawing falls into place.
Stage 4: Add secondary volumes and the landform
Add the smaller shapes that anchor the barn in space. Sketch the open hayloft door, a thin chimney or vent if your reference has one, and the rough roof overhang. Sweep in the fenced field with two horizontal lines and a few post marks. Suggest a distant treeline with a soft wavy ridge. None of this needs detail yet, only placement.
Stage 5: Erase pencil and ink the main contours
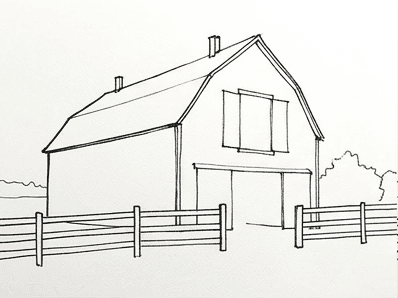
Switch to the 0.3 mm fineliner and trace only the structural edges: roof ridge, gable, wall corners, foundation, fence rails. Vary your pressure on each pass. A heavier line on the front corner of the barn and a lighter one on the far gable will fake depth before any color lands. When the ink is dry, erase every pencil mark with a soft hand.
Stage 6: Ink the boards and surroundings
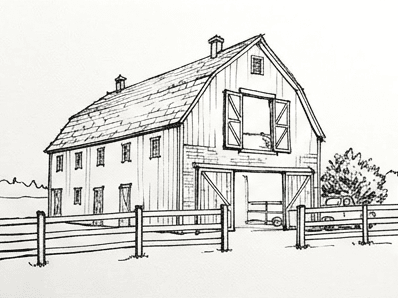
This stage is where your barn earns character. Add the vertical plank lines on the long wall, the cross brace on the hayloft door, a few knots, and the rough seam where the roof tin meets the gable. Drop in fence posts at uneven spacing, then a clump of grass near the base of the barn. Skip any line that does not earn its place.
Stage 7: Lay the palest underpainting
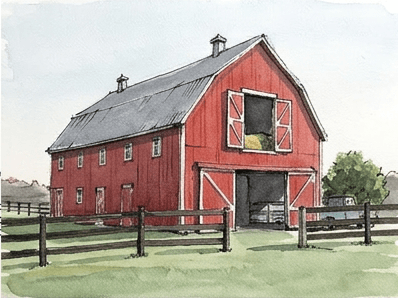
Mix a watery sky tone, a thin warm grey or cool blue, and lay it across the entire sky with a slightly damp brush. While it sits, brush a pale tan or ochre across the field. Let the two washes meet at the horizon and dry naturally. Resist going back in. This first wash is air and light, not detail. If it dries patchy, that is texture.
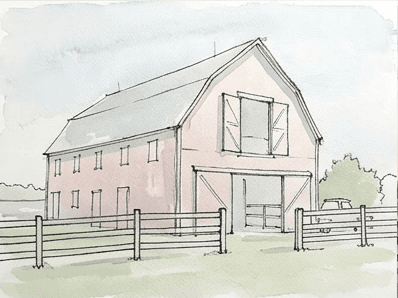
Stage 8: Drop in the mid-tone local color
Put paint where each object actually lives. A warm earth red, like burnt sienna nudged with a touch of cadmium red, goes on the barn walls. Leave the gable end a fraction paler than the long side so it reads as turned away from the light. Drop a soft neutral grey on the roof. Pull a thin green through the field, leaving streaks of the tan from wash one to imply dry stubble.
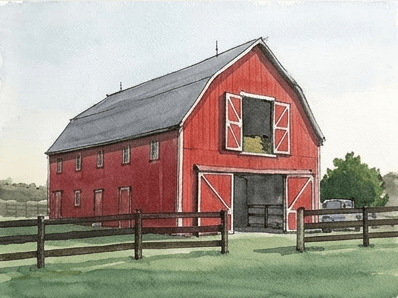
Stage 9: Add the shadow wash and ink accents
Mix a darker version of each local color and add the shadow side of the barn, the inside of the hayloft door, and the underside of the roof overhang. A loose grey wash settles into the field where the barn casts shadow. While the paint is still slightly damp, take the 0.1 mm pen and add a handful of small ink marks: a glint on a roof seam, a few cracks in a board, a bird on the ridge if you want one. Stop before you keep going.
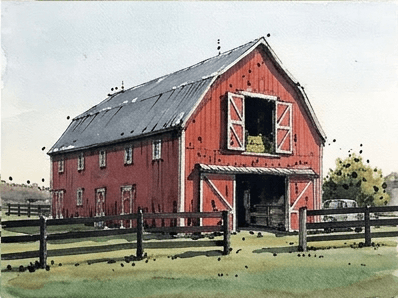
Common mistakes
A barn looks simple to draw and that is exactly why beginner sketches stall. Most failures fall into the same small handful of patterns, so it is worth knowing them by name.
The vanishing point keeps moving. If your roof and your foundation lines slope toward different points on the horizon, the barn warps. Mark one point lightly with an x, then align every horizontal edge to it before you ink anything.
The first wash dries too dark. A heavy underwash flattens everything that follows. If yours landed too strong, blot it gently with a tissue while it is still damp, or lean into it by going darker everywhere and treating the piece as an overcast day.
You inked every plank on the long wall. A wall of identical vertical lines reads as a fence, not as siding. Ink five or six boards near the bright side, two or three near the shadowed end, and let the wash imply the rest.
The barn floats. Without a cast shadow on the ground and a faint horizon transition, the building hangs in the air. Drop a soft grey shadow on the side away from the sun before you sign the piece.
The roof reads as a flat slab. A peaked roof has two angled planes. Sketch the back plane just slightly visible behind the ridge line, even if you only see a sliver. That tiny edge sells the three dimensions of the structure.
Practice prompts
Once today's barn dries, try a few variations to lock in the method while it is still fresh. The next three rural sketch tutorial drills reuse the same nine stages with one variable swapped at a time.
Same barn at golden hour. Drop the sky wash to a warm pink and shift the local red toward a cooler maroon. Notice how much of the change comes from the light, not from the structure of the building.
A different angle. Move your viewpoint until the gable end faces you straight on. You now have a flat facade with no side wall foreshortening, which is a useful drill in pure proportion.
A weathered version. Reuse the same drawing, but break the boards into shorter, rougher segments and let your washes dry with hard edges. A worn barn often reads more honestly than a clean one, and the loose ink and wash style is built for it.
If you want a guided run through this same nine stage workflow on your own reference photo, the Learn to Draw app for iOS and Android does exactly that. Snap a picture of a barn, a farmhouse, or any subject, and the app generates a clean reference, a printed grid of nine stages, and a step by step plan you can sketch alongside. It is the same process as today's tutorial, on whatever caught your eye this morning.

