How to Draw an Elephant in Watercolor: A Loose Nine-Step Guide
Learn how to draw an elephant with loose ink and watercolor in nine forgiving stages that cover proportions, ears, trunk, and savanna light.
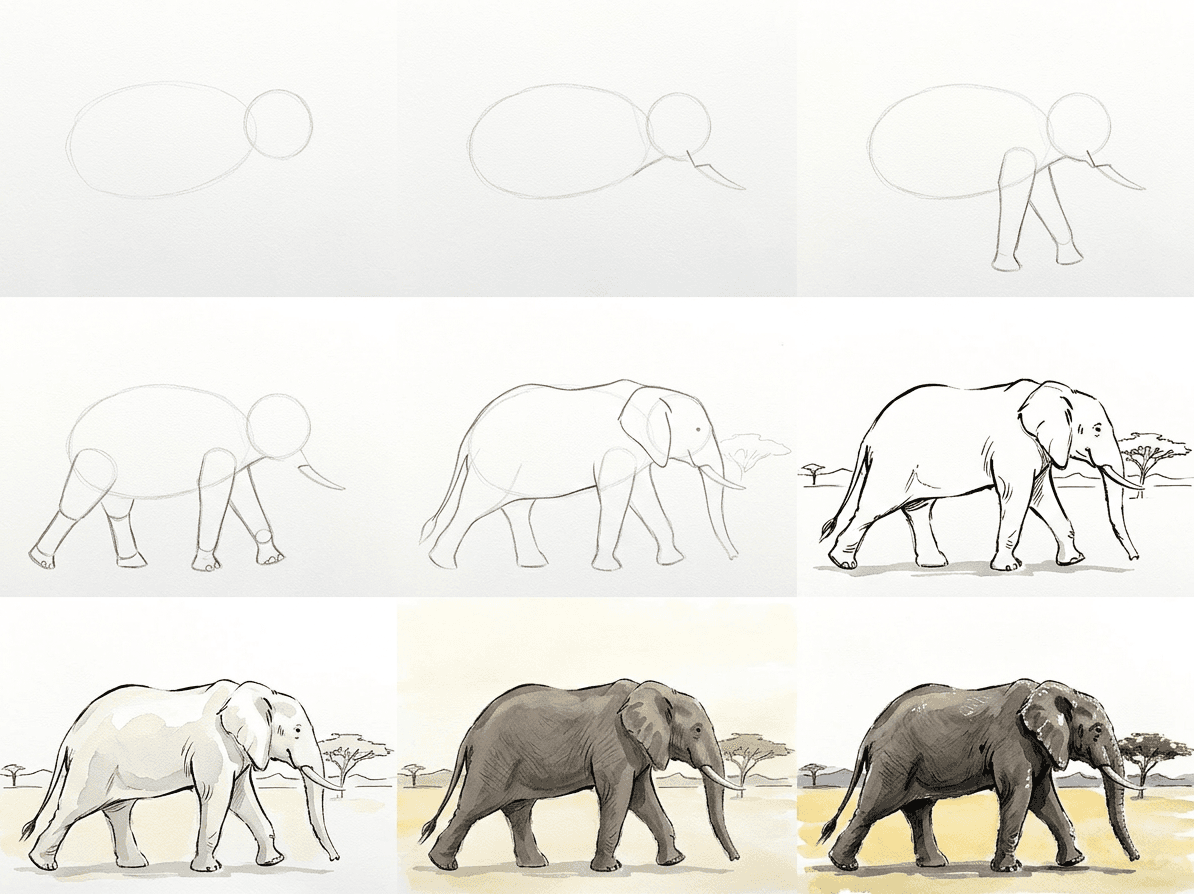
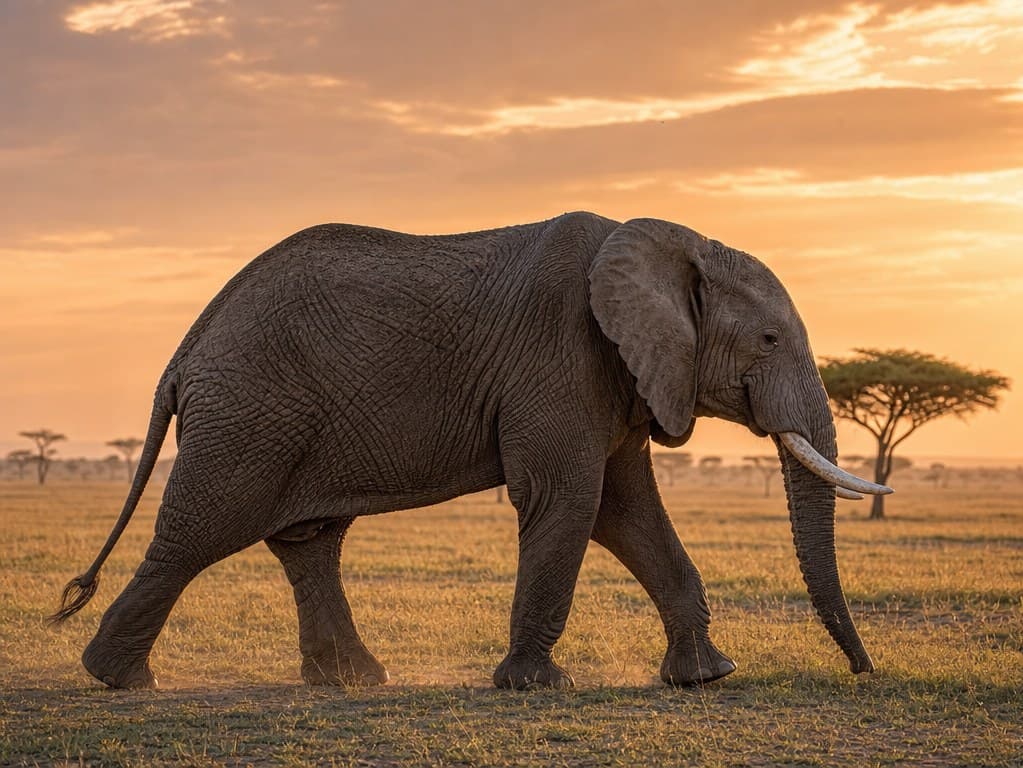
A loose ink and watercolor elephant is a wonderful weekend project because the medium does most of the heavy lifting. You will learn how to draw an elephant in nine forgiving stages, building the body in soft pencil before you ever touch a brush. The reference shows an adult African elephant in profile, walking across the savanna at sunset. By the end you will have a finished wildlife sketch that reads as confident, even though every step behind it was patient and small.
What you will need
Reach for a 2H pencil for the very first layout and an HB for confident contours. Anything harder than 2H scratches the paper, which will show through your washes later. Keep a kneaded eraser within reach so you can lift graphite without bruising the surface.
Cold press watercolor paper around 300 gsm is the easy choice. It can soak two or three layers without buckling, and the slight tooth catches ink lines without spitting. A small palette of yellow ochre, burnt sienna, ultramarine and payne's grey is enough to mix every value you need for grey hide and savanna grass.
For the ink line, use a waterproof fineliner in size 0.3 or a dip pen loaded with a permanent black ink. Round watercolor brushes in size 4 and size 10 give you both broad washes and small accents. A clean water jar, a paper towel and a flat surface complete the kit.
Why we break this into nine stages
The nine-step method exists so you never have to fix a finished drawing. Each stage commits to one decision: the overall mass, then the major shape, then a limb, then the next limb, and so on. You can leave the studio at the end of any stage and the work still looks like a clear, intentional sketch.
This is what makes the construction-line method beginner-safe, and it is what makes an easy elephant painting actually easy. Most failed sketches happen because the artist tried to commit to ink on the first contact with the paper. By building the shape in five soft pencil stages first, you give yourself permission to be wrong four times before any permanent mark goes down.
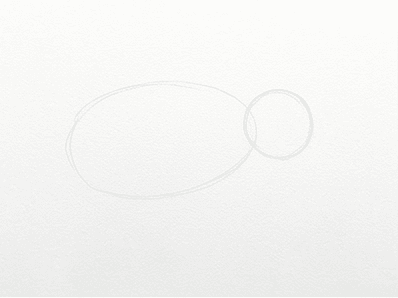
Stage 1, body and head masses
Begin with two ovals. The body is a long, slightly tilted egg that takes up roughly two-thirds of the page width. The head is a smaller, rounder oval set to the left, riding a little higher than you might expect. Leave a finger's width of air between the two shapes so the neck has somewhere to go. Use your 2H pencil with light pressure, since these lines will sit underneath everything else you do today.
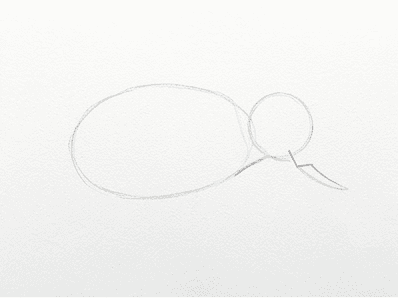
Stage 2, neck, trunk and muzzle
Connect the head and body with two soft diagonals for the neck. The lower one runs almost straight, while the upper one dips into the shoulder. From the front of the head, draw a gentle downward arc for the trunk. Keep the trunk thick where it meets the face and let it taper toward the ground. A small bump above the mouth tells the viewer where the lower jaw ends.
Stage 3, the front legs
Place the near front leg under the front of the body and the far front leg slightly behind it, partially hidden. African elephants have columnar legs, so resist any urge to taper them dramatically toward the foot. Each leg is essentially a soft rectangle that bulges very slightly at the knee. Mark the toenails as a row of small flat tabs across the base of the foot. Keep contact with the ground line you can imagine running under the body.
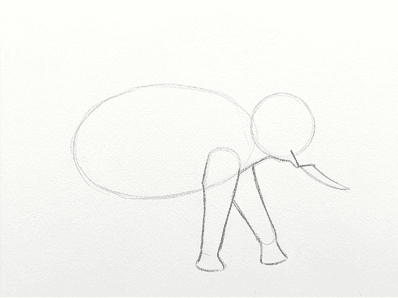
Stage 4, the back legs and stride
The back legs sit further apart from each other than the front pair, and they bend in the opposite direction. Picture the knee pointing forward on the front leg and slightly forward but lower on the back leg. The near back foot is usually planted while the far back foot lifts off in mid-stride. That asymmetry is what gives your figure a sense of weight transfer instead of a stiff pose.
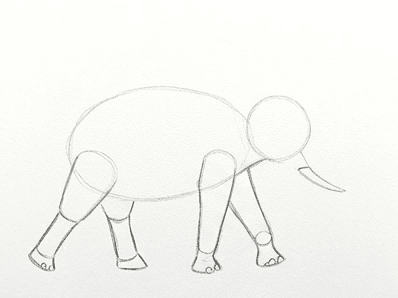
Stage 5, ears, tail and skin contour
The ear is a soft triangle with a rounded leading edge, anchored just behind the eye and falling almost to the shoulder line. Indicate a few thick wrinkles where the ear meets the head. A short tassel tail droops between the back legs, ending in a small brush of hair. Add a few directional pencil marks along the back and belly to show where the skin folds, but do not commit too hard. These are guides for the ink line that follows.
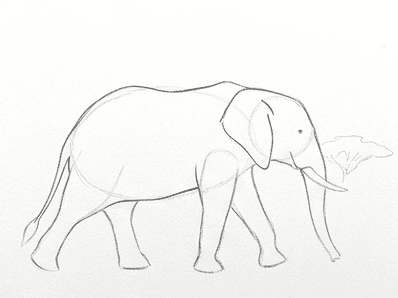
Stage 6, lift pencil and lay the ink
Now lift any pencil you no longer need. Press a kneaded eraser onto the page rather than rubbing, so the surface stays smooth. Once the page is faint, take your fineliner and trace the contours with relaxed, broken lines. Vary your pressure. Let the line ride hard along the underside of the belly and the front of the trunk, then back off across the back and the top of the head. Skip a few small gaps so the line breathes.
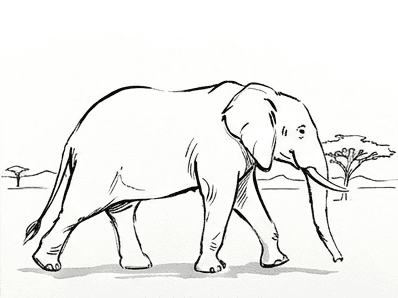
Stage 7, the palest wash
Mix a very dilute payne's grey with a touch of burnt sienna to make a soft warm grey. Wet the whole elephant shape with clean water first, then drop the wash onto the damp paper. The pigment will spread in unpredictable feathered edges, which is exactly what a loose ink and wash elephant needs. Leave a few small white windows on the top of the back and the top of the head so the page itself plays the role of strong sunlight.
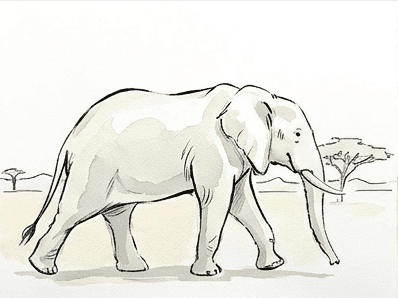
Stage 8, mid-tone local color
Once the first wash is fully dry, mix a slightly thicker grey with a little ultramarine in it. Apply this mid-tone only on the underside of the body, behind the front leg, and along the back leg in shadow. Touch a pale yellow ochre across the ground line so the elephant feels rooted. For the savanna behind, brush a horizontal stripe of warm orange across the upper background and let it bleed into the sky.
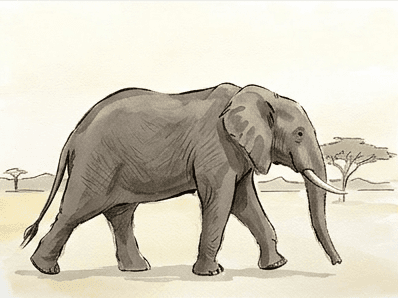
Stage 9, deepen shadows with ink
Reach for the fineliner again and add the darkest accents. Tuck a single dark line along the corner of the mouth, into the ear cavity, where each foot meets the ground, and along the wrinkles you blocked in earlier. Use the size 4 brush with concentrated payne's grey to deepen the shadow under the belly and the inside of the far hind leg. A few small hatching strokes across the trunk add texture without flattening the wash.
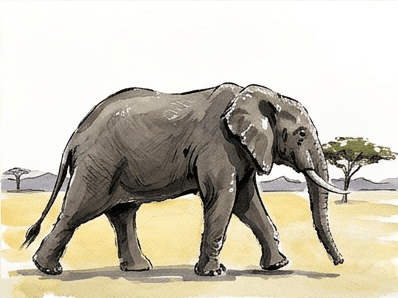
Common mistakes
Most beginner elephants go wrong in the same handful of places. Knowing what they are will save you a stack of paper and a lot of frustration.
- Trunk that hangs straight down. A vertical trunk reads as a fire hose. Give it a soft S-curve and a clear taper toward the tip, even if the reference shows it tucked.
- Legs that taper toward the foot. Real elephant legs are columnar. If yours look like deer legs, widen them at the ankle and re-check the toenail row.
- Ears glued flat to the head. An ear with no separation line will fight your wash. Always leave a sliver of paper between the ear and the head before adding ink.
- Watercolor washes applied to dry paper on the first pass. Wash onto pre-wet paper so the edges feather. Save dry-on-dry for the very last accents.
- Over-inked outlines. If you trace every shape with a hard, unbroken line, the watercolor cannot do its job. Skip a few sections and let the line breathe.
Practice prompts
Once today's elephant is dry, try one or two of these short follow-ups while the medium is still fresh in your hands. Each one nudges a different muscle.
First, redraw the same elephant from a three-quarter angle instead of pure profile. You will discover how much the head's foreshortening changes the trunk shape. Second, sketch a smaller calf walking next to the adult. Smaller does not just mean shorter. A baby elephant has a domed forehead, very short tusks, and a much shorter trunk relative to body length.
Third, take the same composition and shift it to midday lighting. The shadows fall directly underneath rather than long and stretched, which forces you to use cooler grey rather than warm sunset grey. This single change teaches you more about lighting than any number of finished sketches in the same conditions.
Bring it back to your own photos
A loose ink and watercolor elephant rewards patience over polish. The nine-step approach gives you a reliable path from blank paper to finished wildlife sketch without any one stage feeling intimidating. If you want to try this same workflow on a photo from your own camera roll, drop the image into our Learn to Draw app on iOS or Android and it will generate the same nine reference panels in your chosen style, so you can practice with the elephants, dogs or landscapes that matter to you.

