How to Draw a Husky in Pencil: A Step by Step Guide
Learn how to draw a husky in pencil with a clean nine-stage progression that handles fur direction, ear angles, body proportions, and the iconic eyes.
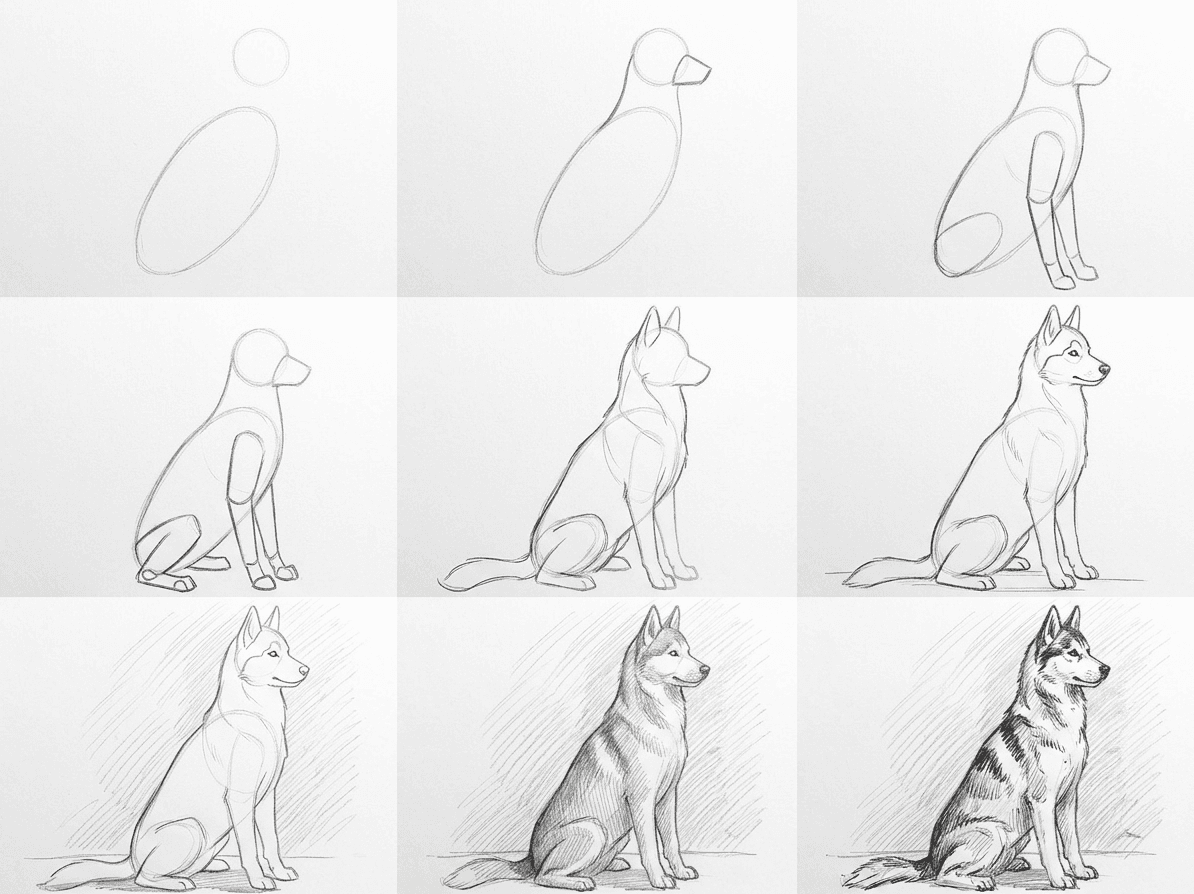
A Siberian husky has a deceptively simple silhouette, until you try to capture both the dense double coat and those calm pale blue eyes on the same page. This guide on how to draw a husky in pencil walks you through nine clear stages, from the first oval masses to the deepest shadow markings. By the end of one focused afternoon you will have a confident graphite portrait of an alert sitting husky and a repeatable method you can reuse on any dog drawing tutorial for beginners.
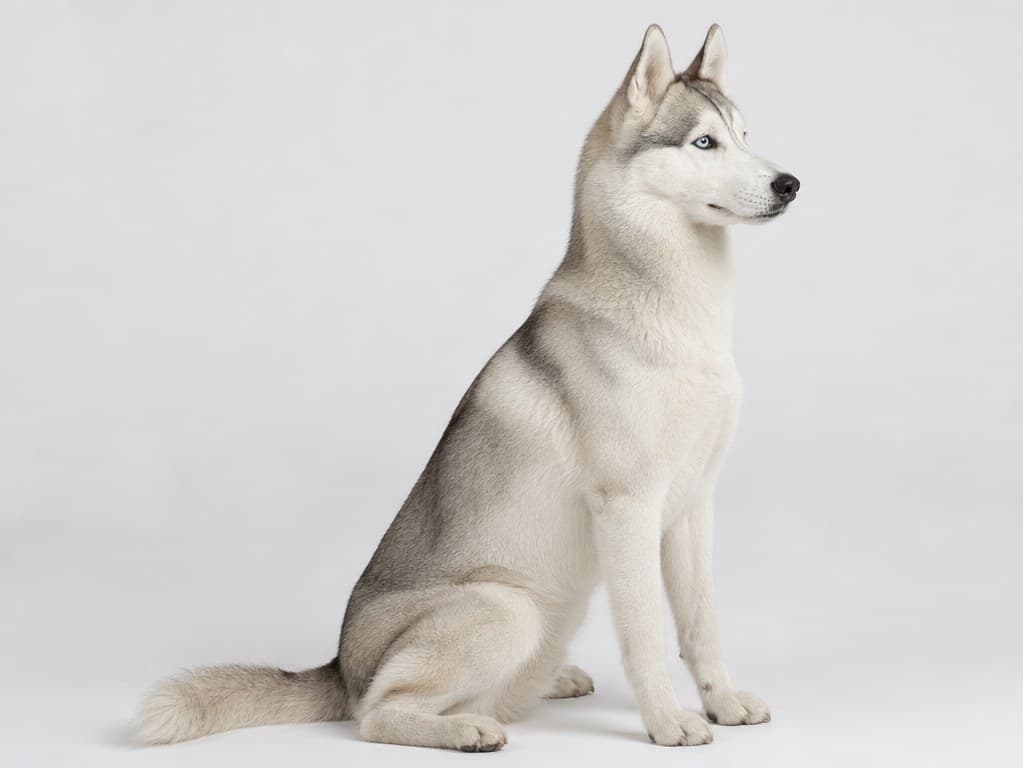
What you will need
A small range of pencils does most of the work for a husky pencil drawing. An HB pencil sets the construction lines without bruising the paper, a 2B carries most of the mid tone fur, and a 4B or 6B handles the darkest passages around the muzzle, nostrils, and pupils. Keep a sharp point on all three, because husky fur reads as a stack of soft directional strokes, not blended grey.
Smooth bristol board or medium tooth cartridge paper at around 160 gsm holds graphite well without forcing you to fight a heavy grain. Tape the page on all four sides if you tend to lean hard, because a buckled page will smear silvery streaks across the dog's back. A kneaded eraser is non negotiable for lifting highlights in the cheek ruff and the eye whites, and a vinyl eraser handles cleanup at the page edges.
Keep a paper tortillon, a small ruler for measuring proportions, and a piece of scratch paper to test pressure before each new stroke. A printed reference at the size you intend to draw helps your eye compare angles directly. Place the reference next to your sketchbook, not above it, so the head tilt stays consistent throughout the session.
Why we break this into nine stages
Construction drawing builds a portrait from the inside out so corrections happen on cheap graphite, not on finished fur. Each stage in this how to draw a husky in pencil tutorial commits to one decision, whether that is shape, contour, value, or detail. If a panel looks off, you can erase only the stroke that broke and keep the work below it. This is the same draw a siberian husky step by step routine professional illustrators use for animal portraits.
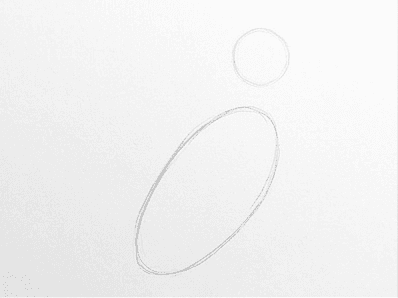
Stage 1: sketch body and head masses
Begin with two ovals, the larger egg for the chest and ribcage and the smaller round shape for the cranial mass. The chest oval sits a touch lower than the head and tips slightly forward, which is what gives a sitting husky its proud upright look. Lock in the centerline of the head and a horizontal line for the eyes, then check the distance between the two ovals. Aim for roughly one head length of negative space between the cranial oval and the top of the chest.
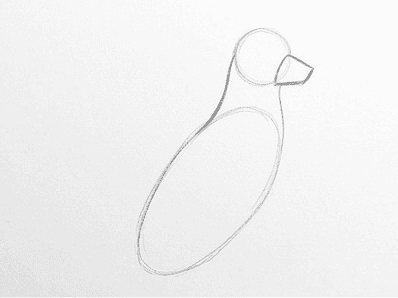
Stage 2: add the neck and muzzle
Connect the head to the chest with two soft curves that bow outward, fuller on the underside where the ruff later sits. Add a short tapered box at the front of the skull for the muzzle, ending in a small wedge for the nose pad. Husky muzzles are narrow next to a labrador or a shepherd, so resist the urge to widen this box. Mark the position of the eyes on the horizontal line you drew before, just behind the muzzle box and inside the skull's centerline.
Stage 3: add the front limbs
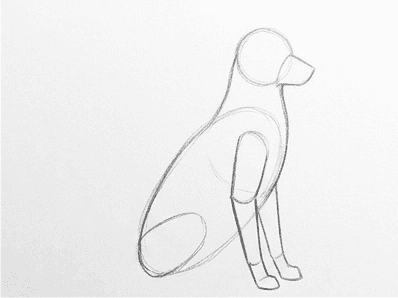
Draw two simple cylinders from the bottom of the chest oval down to the floor for the front legs, keeping them parallel and roughly shoulder width apart. The paws read as soft rectangles with three small toe bumps each. Notice that the elbow sits just behind the chest line, not in front of it. A common slip here is angling the legs outward, which makes the dog look braced instead of relaxed. Keep both columns straight and quietly vertical for the calm pose.
Stage 4: add the back limbs and paws
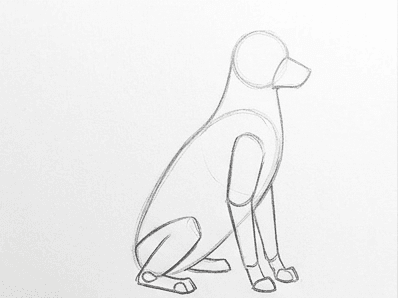
Sketch the rear legs as a folded triangle on each side of the chest oval. The hock joint sits low and just behind the front paws, with the back paw rotated slightly outward. Keep the hindquarters compact, because a sitting husky pulls its weight neatly underneath the body. Mark the underside of the belly with a soft curve that meets the back of the front legs. This panel is your first easy husky sketch with all four limbs and a coherent silhouette in place.
Stage 5: add ears, tail, and fur contour
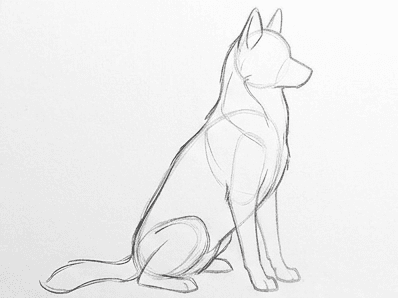
The husky's ears are the signature shape, two firm triangles set wide on the skull, tips pointing straight up, leading edges rolling forward a touch. Sketch them as flat planes first, then add a soft inner curve for the ear canal. The tail tucks down along the right hip in this pose, so draw a curved teardrop that brushes the ground. Now trace the entire outer contour of the body, replacing your construction lines with the broken, slightly fluffy edge of real husky fur.
Stage 6: add eyes, nose, and ground line
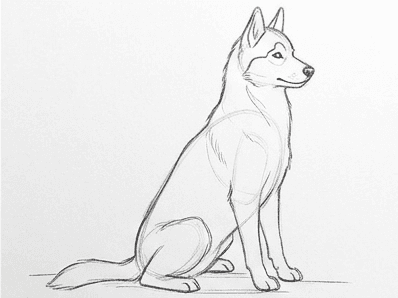
The eyes do most of the personality work, so spend extra time here. Draw two almond shapes set just inside the skull's center column, tipped very slightly upward at the outer corners. Add a clean circle for the iris in each and a smaller black pupil. The nose pad is a flattened triangle with two small nostril holes. Finally, run a light horizontal line just below the front paws to give the dog a place to sit and a hint of cast shadow.
Stage 7: shade the background and cast shadow
Switch to your 2B and lay a soft, even tone across the negative space behind the dog. Keep the strokes loose and uniform, angled at about forty five degrees, so the background never competes with the fur. Pull the same tone slightly darker just under the belly and behind the rear paws to create a shallow cast shadow on the ground line. The contrast immediately lifts the white fur and gives the page a sense of real depth and air.
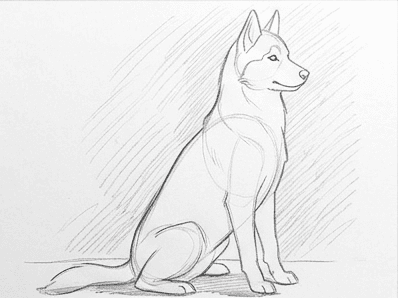
Stage 8: hatch the shadow side of the coat
Pick the side of the dog that faces away from the light, usually the right hip and the underside of the chest in this reference. With your 2B held at a low angle, lay parallel hatching strokes that follow the direction the fur grows. Stack a second layer at a slight cross to deepen the shadow on the deepest pockets, like under the chin, behind the front legs, and between the rear paws. Keep the top of the back and the bridge of the muzzle clean for now.
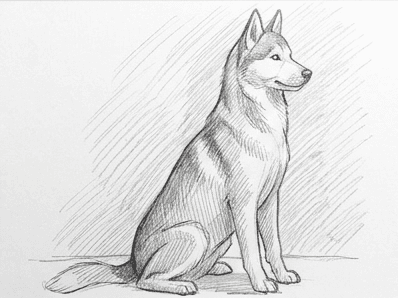
Stage 9: place the darkest darks and markings
This is the panel where the husky finally appears. Swap to your 4B and place the deepest darks, the inside of the ears, the pupils, the nose pad, and the famous saddle marking that runs from the shoulders down the back. Pull short directional strokes around the muzzle mask and across the saddle, leaving small slivers of white paper for the cheek ruff and the chest blaze. Lift highlights out of the ear interiors with the kneaded eraser, then sign your name in the corner.
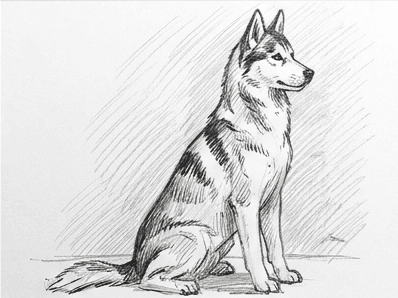
Common mistakes
Even careful artists trip over the same three or four pitfalls when drawing a husky. None of these are fatal, and each has a clean recovery you can do without starting over. The fixes all live earlier in the construction sequence, so the kneaded eraser is your best friend through the whole process.
The first problem is a muzzle that creeps wide. Many beginners default to a generic dog snout and end up with a labrador's blunt nose. If you spot a wide muzzle after stage four, lift the side lines with a kneaded eraser and redraw the box narrower, and the husky face will snap back instantly. The second is eyes that drift too high or too far apart. Huskies have eyes set about one eye width apart and on the horizontal centerline of the skull.
The third pitfall is fur that reads as fuzz. New artists often blend graphite with a finger to fake softness, which kills the directional structure of the coat. Use short directional strokes that follow the fur growth, and the coat will look soft on its own. The fourth pitfall is a saddle marking that lands flat. The shoulder cape on a real husky wraps around the body in three dimensions, so the dark patch should narrow toward the spine and broaden out at the shoulders.
Practice prompts
Once this single sitting husky feels solid, push the method onto fresh references the same week so the muscle memory sticks. The repetition is what turns a one off success into a reliable approach you can pull up from memory.
Try a husky in profile rather than three quarter view, because the long muzzle and ear set become the dominant shape language and force you to nail the proportions in a different way. Switch to a working husky pulling in harness on snow, since the forward lean changes which fur falls into shadow and the harness gives you a chance to practice clean man made lines against soft coat texture. Finally, draw the same sitting pose with a black and white husky, a sable husky, and an agouti husky in turn, because each coat pattern asks for different shadow placement and teaches you to read markings as separate layers from form.
Where to go next
The same nine stage construction routine works for a malamute, a shiba inu, or your own retriever at home. Use this post as a printable check sheet next time you sit down with a clear afternoon and a fresh page. If you would rather work straight from a photo of your own dog, the Learn to Draw iOS and Android app runs the same nine panel pipeline on any reference you upload, so you can practice this husky method on a hundred different subjects.

