How to Draw a Kitten in Loose Ink and Watercolor
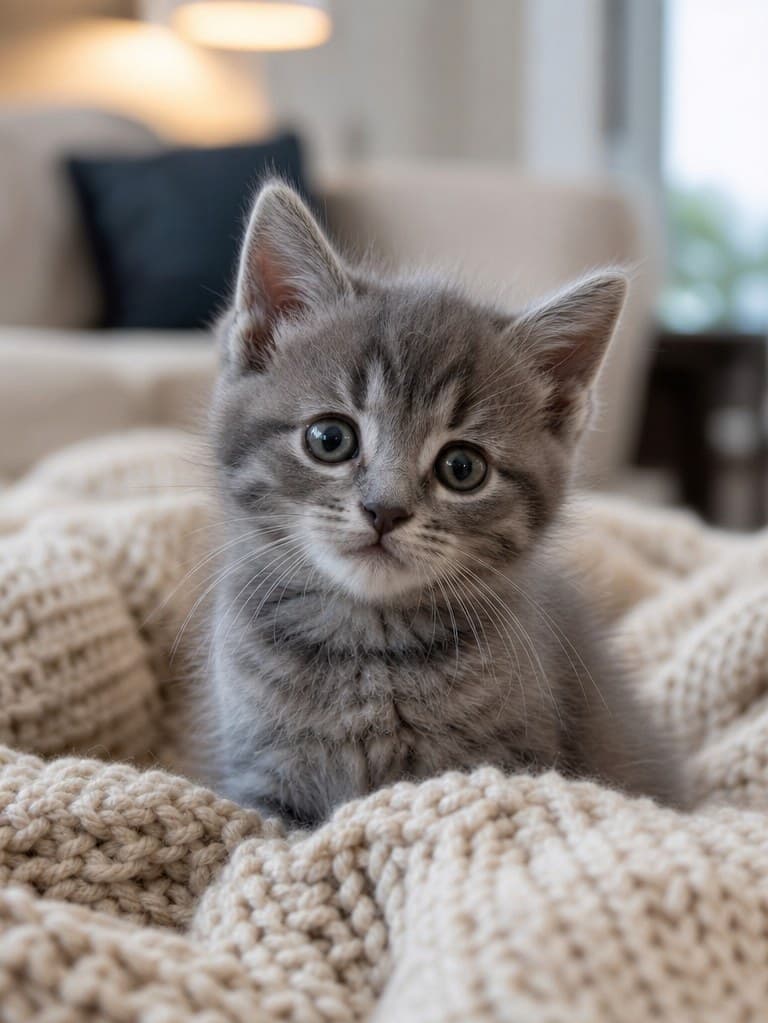
Learn how to draw a kitten in loose ink and watercolor with nine calm stages that turn a soft window-lit reference photo into a finished pet sketch.
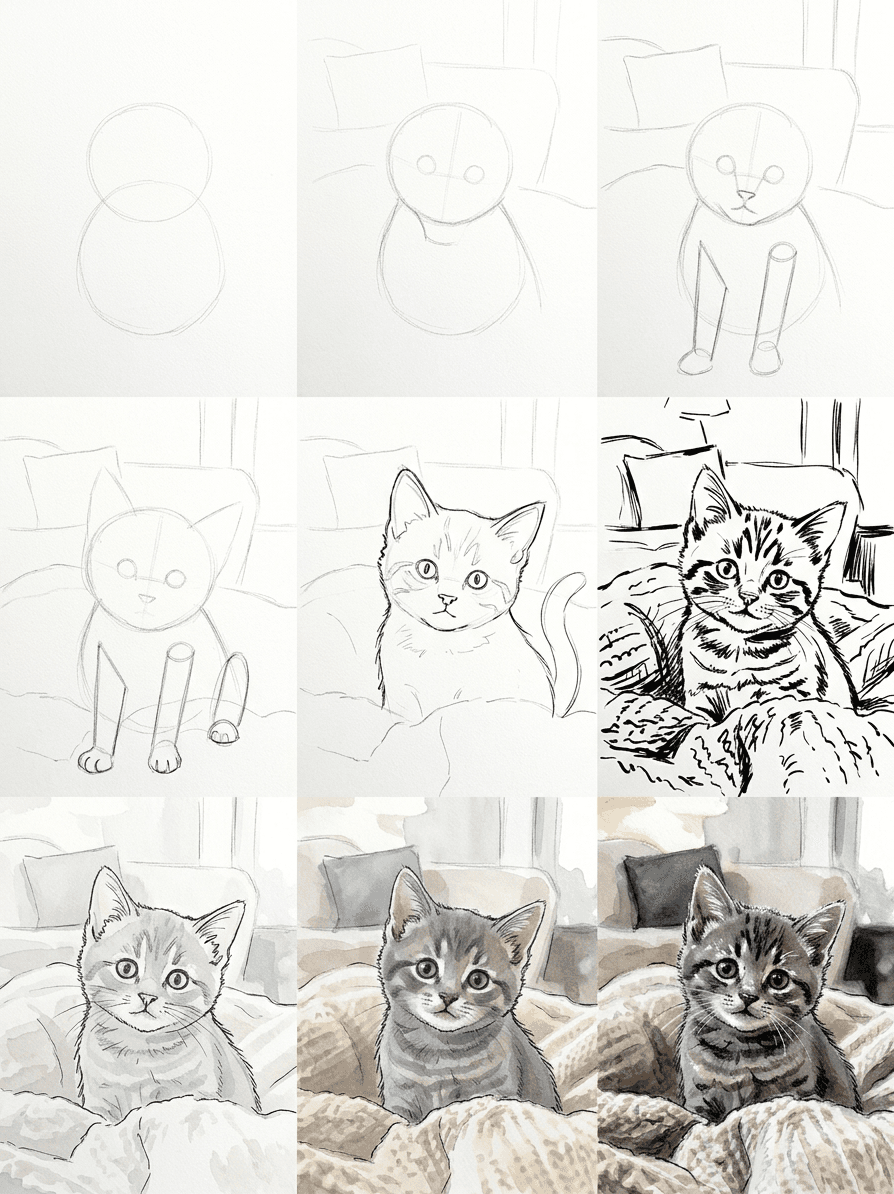
Kittens look impossibly soft, which makes them tricky for anyone trying to learn how to draw a kitten without ending up with a stiff, cartoony shape. The trick is to slow down and let watercolor do the softening for you. This guide walks through how to draw a kitten in nine numbered stages of loose ink and wash, starting with two simple ovals and ending with a sleepy grey baby cat curled on a knitted blanket. You will finish with a small portrait you can repeat on any reference you love.
What you will need
Pick up a small block of cold-press watercolor paper, around 140 lb (300 gsm), and tape it to a rigid board on all four sides. Cold-press has enough tooth to break a wash and hint at fur without making you paint every hair. Letter size or A4 is plenty for a kitten study, since a smaller format keeps the washes manageable and stops you from fussing the surface to death.
An HB pencil handles the layout and a kneaded eraser lifts those lines later without scoring the page. For the line stage pick a waterproof black fineliner, such as a Micron 03 or a Lamy refillable. Drop a wet brush onto a test mark before you start, because a runny ink line will bleed straight into the first wash and turn the kitten muddy on contact.
Three pans cover the whole painting: a cool blue like Prussian or cobalt, a warm earth like burnt sienna, and a touch of yellow ochre for the inner ears and muzzle. Mix the blue and earth for a soft grey and a darker neutral. A round size 6 brush carries the body washes, while a size 2 handles eyes, whiskers, and the small marks that sell the kitten as a real animal.
Why we break this into nine stages
Most of the time, a kitten watercolor tutorial fails because the writer jumps straight to color over a shape that has not been placed. Splitting the work into nine numbered stages fixes that. You build the body in soft pencil first, layer the face and limbs while everything is still movable, then lock the drawing with a loose ink line before any pigment touches the page. The washes themselves only arrive in the last three stages, which is just enough painting to feel finished without overcooking the surface.
Stage 1: block the body and head masses
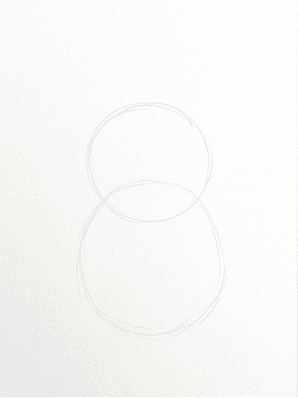
Start by lightly sketching the two largest masses: a soft oval for the body and a smaller rounder shape for the head. A sitting kitten in profile reads as a gentle pear, so let the head perch on the front-top corner of the body rather than sit directly above its center. Mark a faint vertical line down the middle of the body so you remember which side faces the viewer, and keep every pencil mark light enough for a kneaded eraser to lift later.
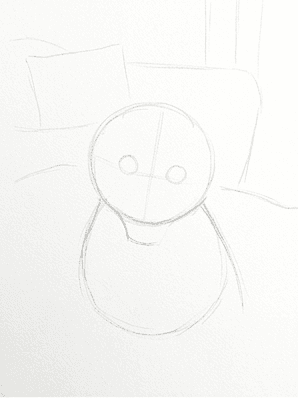
Stage 2: place the neck and muzzle
Connect the head to the body with a short, slightly tapered neck. Sketch the muzzle as a small wedge below the front of the head, no longer than a third of the head's height. Place two faint dots where the eyes will sit, just below the midline of the skull, and check that they land closer to the muzzle than to the top of the head. That single placement choice is what makes the face read as a kitten and not a small adult cat.
Stage 3: tuck in the front limbs
A seated kitten drops both front legs straight down under the chest. Draw them as a pair of soft cylinders that splay slightly at the paws. Keep the elbows hidden inside the body silhouette so the limbs look like they grow out of the chest rather than stick on. If the legs feel too skinny next to the head, thicken them, because a kitten's front legs read chunky and slightly bowed compared with a grown cat's.
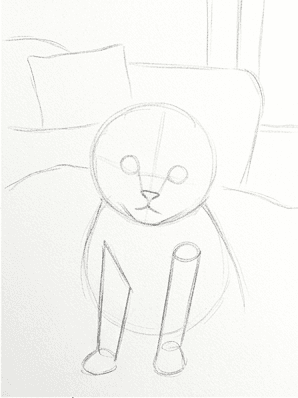
Stage 4: settle the back limbs and paws
In a sitting pose the back legs fold beside the body, with the haunch poking out as a soft rounded triangle. Bring the back paws forward so they sit just behind the front paws, with the toes turned slightly outward. Watch the small negative space between the front and back paws, since that little wedge of blanket is what makes the kitten look settled into the surface rather than awkwardly propped up on top of it.
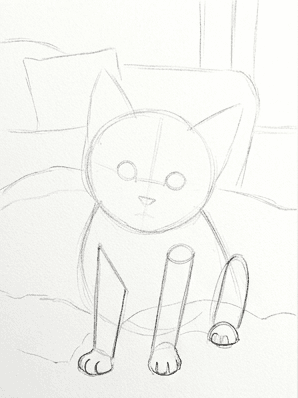
Stage 5: add ears, tail, and the soft contour
Kitten ears are large for the head and sit closer together than you might expect, so plant their inner edges almost touching the centerline of the skull. Curl the tail loosely around the front paws or trail it along the side of the body. Then walk the pencil around the entire silhouette, lifting and pressing to suggest a fluffier contour rather than a hard outline. This is the last chance to fix any wonky shape before the ink locks the drawing in.
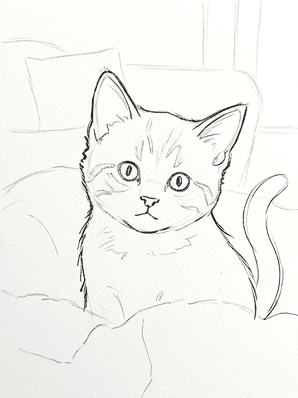
Stage 6: erase the pencil and ink the essentials
Lift the pencil under a kneaded eraser until you can barely see your shapes. Then ink the essential edges with your fineliner using a loose, broken line. Skip parts of every edge, especially along the soft top of the head and the underside of the tail, so the first wash has somewhere to breathe. Mark the eyes, the small triangle of the nose, and a faint slit for the mouth. The drawing should look unfinished on purpose, since the watercolor will pull it together.
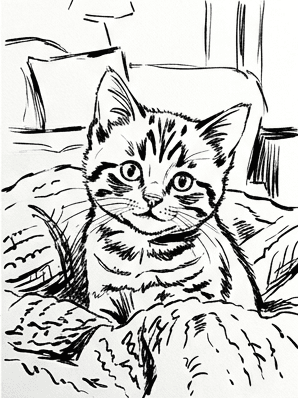
Stage 7: lay the palest wash
Wet the whole kitten with clean water, leaving the eye highlights and the brightest fur tufts bone dry. Drop in a very pale grey wash across the body, fading it out near the chest and the inside of the ears. Lay a slightly cooler note along the shaded side and the underbelly. This first pass sets every value that will eventually read light, so reserve all your whitest whites now. Nothing you do later can put white back on the page.
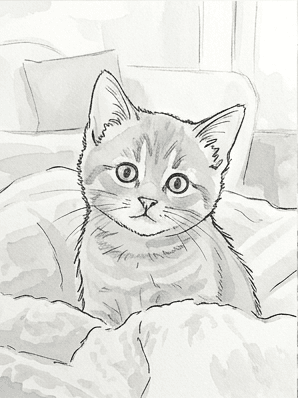
Stage 8: build the mid-tone local color
Once the first wash is dry, layer mid-tones to give the kitten its real local color. A grey kitten needs a warm grey on the sunlit side and a cooler grey in shadow. Drop a thin yellow ochre wash into the inner ears, the muzzle, and the paw pads, and let it bleed slightly into the surrounding fur. Keep edges soft on the body and a touch crisper around the face so the eyes and nose stay the focal point of the whole picture.
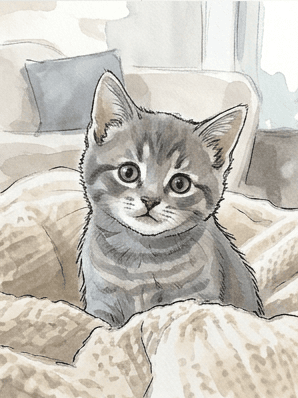
Stage 9: deepen shadows with ink accents
Mix a dark from your blue and earth, then drop shadow into the deepest pockets: under the chin, between the limbs, behind the ears, and along the line where the kitten meets the blanket. Add a few short ink accents back into the darkest spots for grit, and define the pupils with a tiny stroke of near-black. Then stop. The next mark is almost always the one that kills the painting, especially on an easy cat painting where overworking flattens the soft fur.
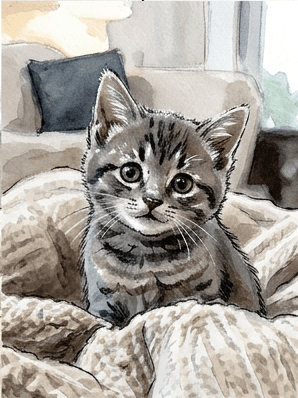
Common mistakes and how to recover
Four failure modes show up over and over when beginners run through how to draw a kitten this way. The first is making the head too small. A kitten head is closer to two-thirds the size of its body, not the half-and-half ratio you would use for an adult cat. If the head feels off, hold your pencil at arm's length and measure the head against the body before you ink anything, then erase and rescale.
The second is floating the eyes too high on the head. Kitten eyes sit low, just below the midline of the skull, and that single placement choice is what makes the face read as a baby animal. If the eyes have drifted up, erase them, drop them three or four millimeters lower, and check again. The whole face usually relaxes the moment the eyes land in the right spot.
The third is over-inking the fur. A loose ink and wash kitten lives or dies on how much line you leave out. If the sketch is starting to look like a coloring page, stop inking, let the page rest, and lean on the next watercolor wash to soften the silhouette. The lines you did not draw are usually the ones doing the most work in the finished piece.
The fourth is drowning the body in too much pigment. Grey kittens are mostly light grey with a few deeper notes, not solid grey from nose to tail. If the body has gone uniformly dark, lift pigment with a damp clean brush along the chest and shoulders before the wash sets, or wait until dry and gently scrub a highlight back in with a stiff brush along the same area.
Practice prompts to lock the workflow in
Once the first kitten is dry, pull a fresh sheet and run the same workflow on a different coat. Try a tortoiseshell or tabby reference and run through how to draw a baby cat step by step using the same nine stages. Notice how the mid-tone stage gets busier while the silhouette stays almost identical. The drawing order does not change. Only your wash plan does, and that is the cheapest way to test your method.
Then push the format. Try the same kitten on a small square sheet with the body cropped tight, so the face takes up two-thirds of the page. The composition forces you to commit to the eyes, the nose, and the muzzle, and it rewards a slightly heavier pencil stage with more attention to the placement of each whisker root and the slope of the brow.
For a third variation, swap the sleepy curl for a playful pose. A kitten mid-pounce or stretching for a toy hits the same nine stages but stresses your gesture line. If the underdrawing reads flat, redraw the body axis as one curved line first and rebuild the masses around it. The rest of the workflow holds, even though the silhouette has changed.
If you want to run this same nine-stage workflow on your own kitten photos, the Learn to Draw app does the gridded breakdown for you on iOS and Android. Drop in any pet picture, pick the loose ink and wash style, and the app returns a printable nine-cell guide you can copy from. Today's exercise has given you the method by hand. The app is just there for the days when you want a head start.

