How to Draw a Rooster in Ink: A Step by Step Guide
Learn how to draw a rooster in ink with a nine-stage workflow that shapes the comb, tail feathers, and proud stance for a clean farm bird sketch.
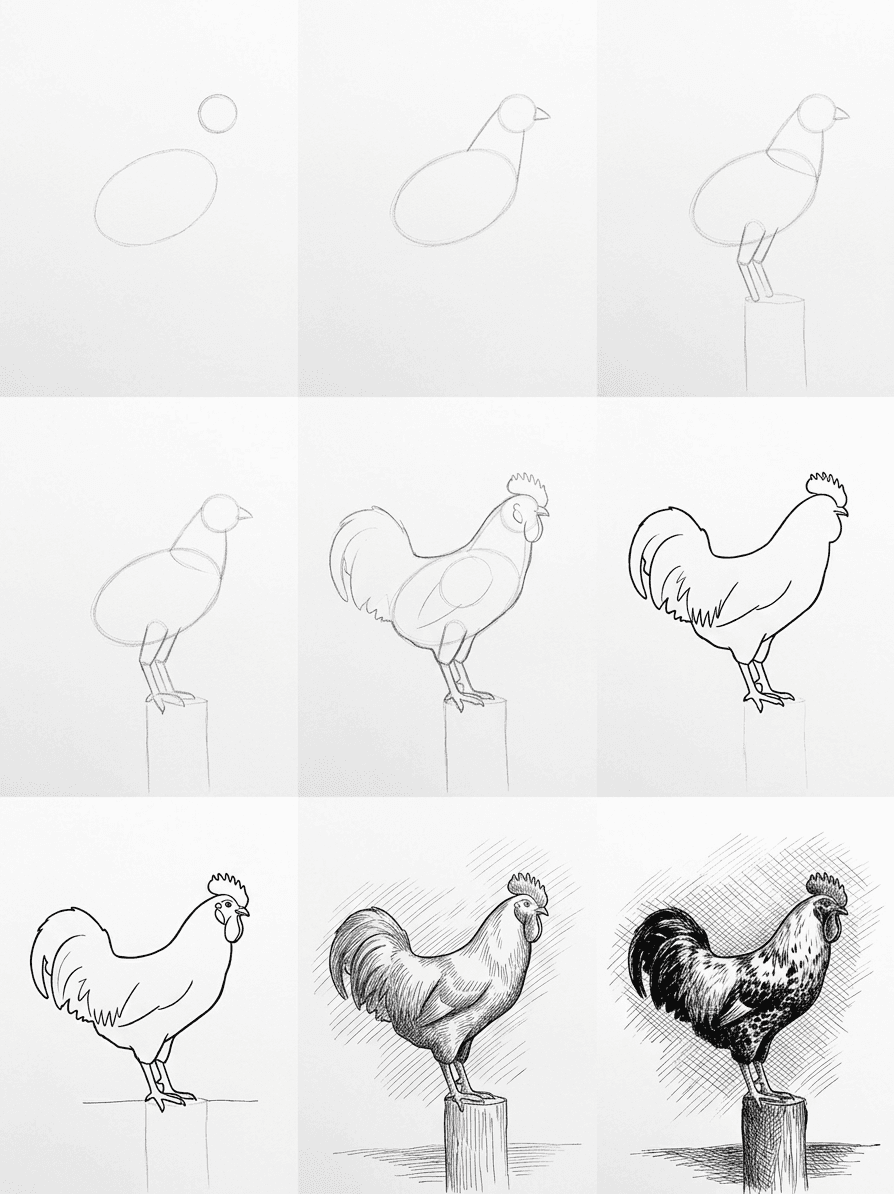
A rooster is one of the most graphic farmyard subjects you can pick. The bold comb, the sweeping tail, and the upright stance all sit neatly inside a single portrait frame. This walkthrough on how to draw a rooster in ink takes you from a loose pencil scaffold to a finished black-and-white drawing in nine clean stages. By the end you will have a confident farm bird sketch that reads from across the room, with the comb, tail, and feet all in their right places.
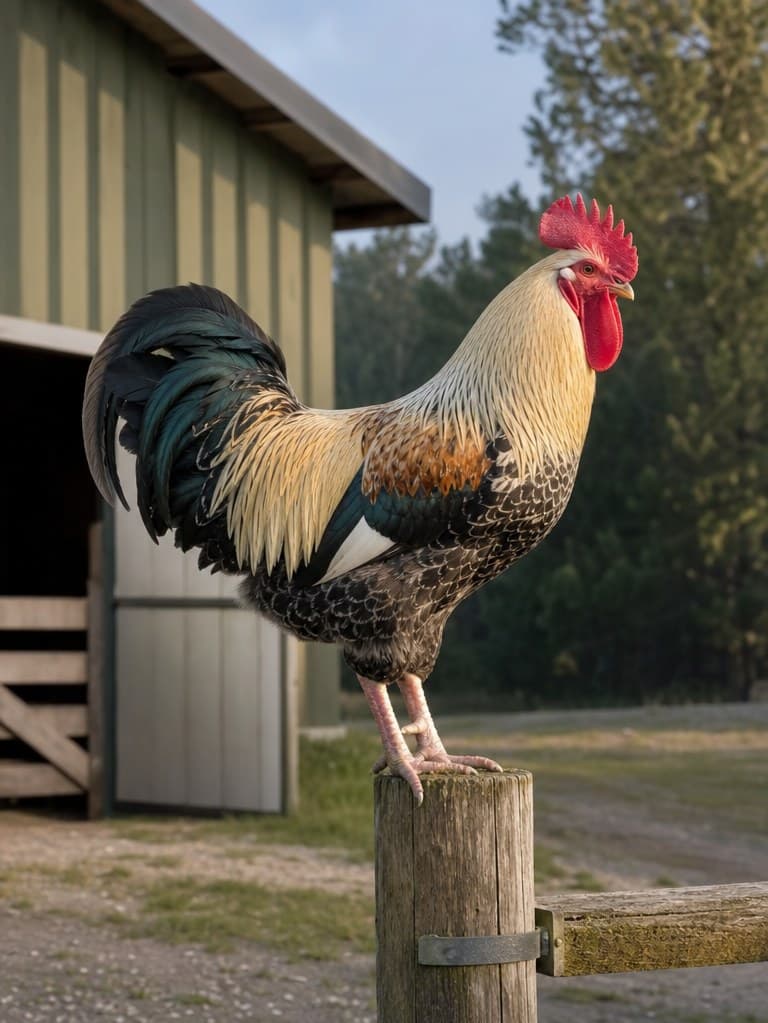
What you will need
A standard HB pencil for the first construction lines, a 2B for slightly darker scaffold marks, and a clean kneaded eraser are the only graphite tools you need here. A 4B comes in handy later if you want to push the ground shadow a touch darker before you ink over it.
For the ink layer, a 0.3 fineliner handles the outline, a 0.1 takes the fine feather detail, and a 0.5 or a small brush pen carries the dark accents in the tail. A 90 to 100 gsm smooth drawing paper holds clean lines without bleeding, which matters once you start hatching.
Set the reference photo where you can glance at it without turning your head. Keep a scrap of the same paper near your drawing hand so you can test a stroke before you commit it. That habit alone saves the average beginner two ruined drawings a week.
Why we break this into nine stages
A rooster looks busy, but the underlying structure is calm. You have a tilted egg for the body, a smaller sphere for the head, two thin arcs for the legs, and a fan of overlapping shapes for the tail. The nine-stage method lets you settle each block in turn, so you never face a tangle of feathers without knowing where the bird stands. Each panel below is one decision: a shape, then a contour, then a tone. If a panel feels off, you fix it before the next one builds on top of the mistake.
Building the drawing stage by stage
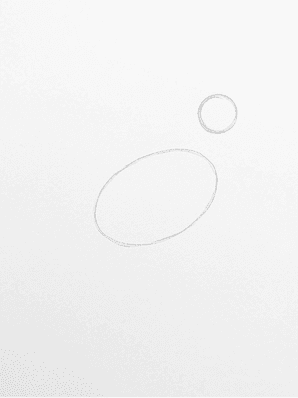
Start light. With your HB pencil, place a tilted oval near the middle of the page for the body. Drop a smaller circle for the head above and slightly forward of the oval. Sketch a short, gentle curve where the neck will live. Keep every mark faint enough that a finger could erase it. You are aiming for proportion right now, not personality.
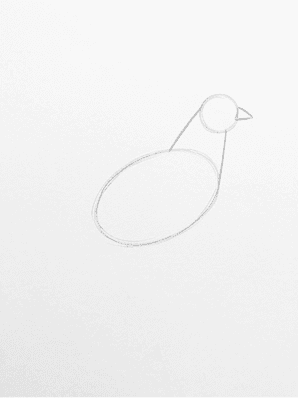
Now connect the head and body with two soft S-curves for the neck. The front curve is shorter and dips inward beneath the throat. The back curve flows up from the shoulder. Add a small triangular wedge on the head for the beak, with the upper part slightly longer than the lower. Mark a tiny dot for the eye, set just above and behind the base of the beak.
A rooster's front is its crown of soft tissue: the comb on top of the head and the wattle hanging beneath the beak. Block in the comb as a row of three or four soft, rounded peaks. Drop the wattle as two stacked teardrop shapes under the chin. These elements set the species and the personality, so spend a minute on placement before you commit to the contour.
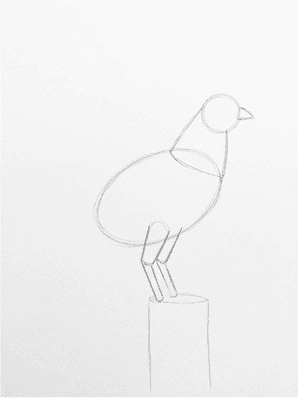
Move down to the legs. Sketch two thin cylinders dropping out of the lower half of the body oval, set just behind its center. The visible front leg bends forward in a relaxed step, and the back leg props the body from behind. Add three forward toes and one short rear toe on each foot, ending in a small claw. Keep the lines pencil-light, since the legs hold the weight later.
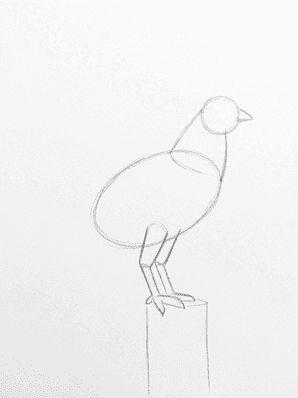
This is where the bird gains its silhouette. Sketch a tiny almond shape behind the eye for the ear patch. Then build the tail with three or four long, sweeping arcs that lift up and curl back down from the rear of the body. Trace the outer feather contour around the breast and back so the body oval starts to feel feathered rather than smooth.
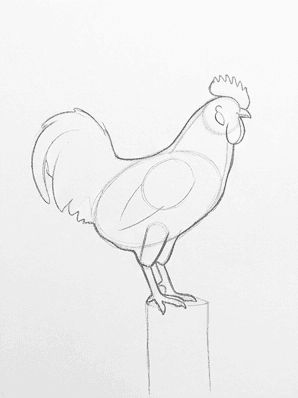
Take a breath, then pick up your 0.3 fineliner. Trace the outer silhouette of the rooster in one slow, confident pass: body, neck, head, comb, wattle, tail, legs, feet. Do not chase a perfect line, since a slight wobble reads as drawn rather than printed. Once the ink is dry, erase every pencil mark you can reach. The drawing should look clean and a little empty.
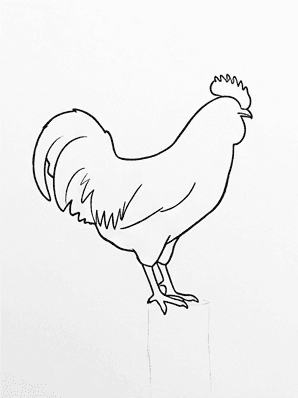
Switch to your 0.1 fineliner and add the inner features. Draw the eye as a small filled circle with a tiny white reserve for the catchlight. Mark the nostril on the upper beak. Add a few short ticks where the leg scales meet the foot. Then, with the 0.3 again, place a single broken horizontal line across the page for the fence post or ground. That one line locks the bird into a world.
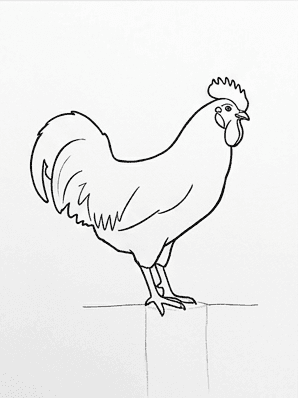
Now you build value. Hatch with parallel diagonal strokes in the breast and along the back. Keep each stroke following the curve of the body so the rooster reads as round rather than flat. Add light, looser hatching behind the bird so the silhouette pops without crowding it. Leave the comb mostly bare so it stays the lightest area in the drawing, since that contrast does most of the storytelling.
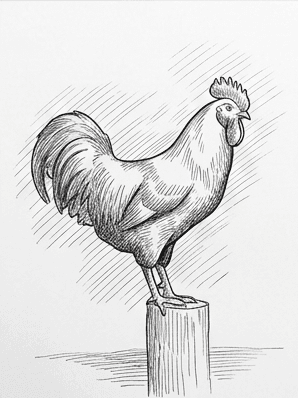
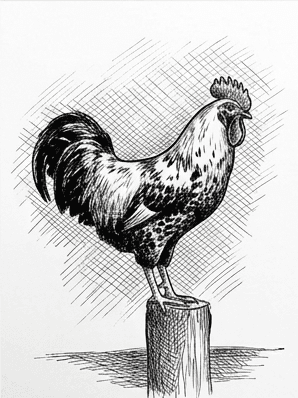
Finish with cross-hatching on top of the first hatch layer in the underside of the body, the rear of the tail, and the shadow side of the legs. Switch to the 0.5 fineliner or the brush pen for the deepest darks: inside the tail, the pupil of the eye, and the strip of ground directly beneath the feet. Stop when each value group reads cleanly.
Common mistakes
The first error to watch for is a wandering body axis. Many beginners place the head directly above the body, which makes the bird look stiff and toy-like. Fix it by tilting the body oval forward so the line from the back of the head down to the base of the tail forms a gentle diagonal.
The second is a flat comb. If you draw the comb as one round lump, the species reads as a hen instead of a rooster. Break the comb into three or four peaks of different heights, with the tallest peak set just behind the brow rather than in the middle of the head.
The third is over-inked tail feathers. The temptation is to outline every single barb. Resist it. Pick two or three long contour lines for the longest feathers, then carry the rest of the tail in hatch and cross-hatch value. Outline plus hatching on every feather flattens the silhouette into a fan of pasta.
The fourth is grey, muddy hatching. Beginners often hatch in many directions on the same surface, which reads as fuzz rather than form. Pick one stroke direction per surface and stick with it. Cross-hatch is a second layer at a clear angle to the first, not a scribble of any angle you fancy.
The fifth is missing the ground line. A drawing of a rooster floating in white space looks unfinished, no matter how clean the rooster ink drawing is on its own. The single horizontal line under the feet costs nothing and grounds the bird in seconds.
Practice prompts
Try the same stages on a hen tomorrow. She lacks the long tail and the tall comb, so the construction simplifies into a softer egg shape with a low crown. The first three panels will feel familiar, and the remaining six will teach you how much work the tail does for a rooster.
For a tougher pass, redraw the rooster from a three-quarter angle instead of profile. The head still sits on a short S-curve, but now one wing edge becomes visible behind the breast and the tail feathers compress in space. Working that overlap honestly is where the real chicken sketch skill lives.
If you want a quick color study, run the same nine stages, then add a single warm wash of red over the comb, wattle, and outer tail. Keep everything else in line and tone. That one splash of color turns a workmanlike easy rooster tutorial into a small piece of barnyard portraiture.
That is one finished rooster, built from nine small choices instead of one big one. If you want to run this same nine-stage workflow on your own photographs, the Learn to Draw app on iOS and Android does exactly that for any reference you feed it, returning a clean step by step grid you can follow with the same pencil and ink kit you used today. Pick a bird from your own yard, your phone camera, or the local farm, and see how the stages translate.

