How to Draw an Acoustic Guitar: A Step by Step Pencil Tutorial
Learn how to draw an acoustic guitar in pencil with a clear nine-stage tutorial that covers the body, neck, soundhole, strings, and shading.
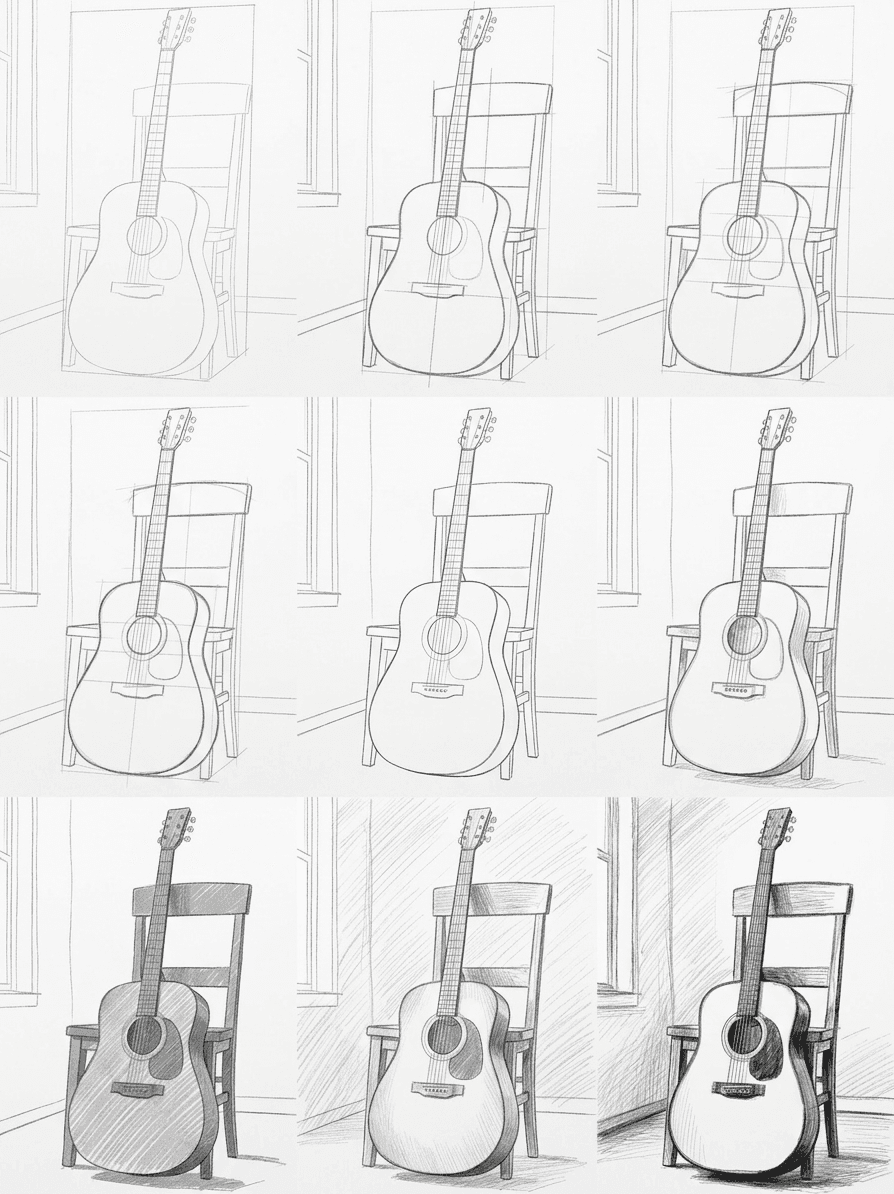
An acoustic guitar looks intimidating until you see it as a stack of simple shapes: a soft figure eight for the body, a long rectangle for the neck, and a flared block at the top. This guide shows you how to draw an acoustic guitar in pencil from a blank page to a finished sketch. You will work through nine short stages, each one no harder than the one before. The reward is a portrait of a real instrument that hangs together as a whole.
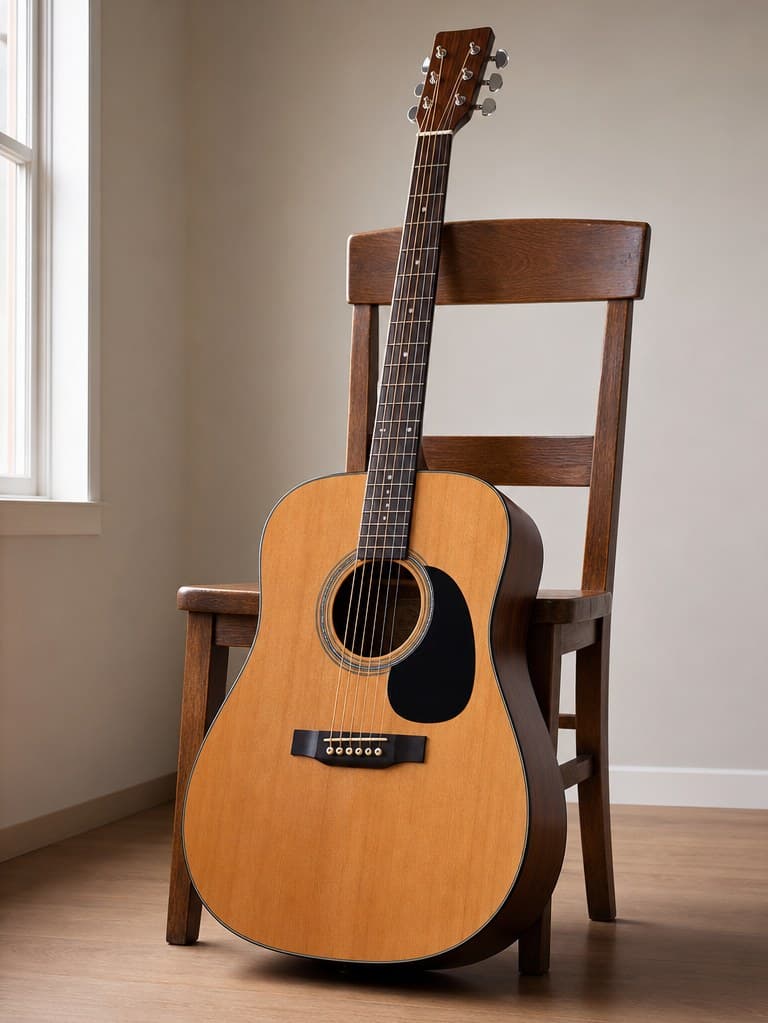
What you will need
You need three pencils for this drawing: a hard 2H for layout lines, a soft HB or 2B for the medium values, and a darker 4B or 6B for the deepest shadows under the strings and inside the soundhole. A kneaded eraser handles soft lifts and gentle highlights without leaving crumbs on the paper. A plastic eraser, ideally one with a thin cut edge, is useful for picking the bright reflections out of the body later.
Paper matters more than people think. A medium tooth sketchbook around 100 to 160 gsm is a safe place to start. It is heavy enough to take graphite layers without buckling and smooth enough to keep your hatching neat. Tape the sheet down at the corners if you tend to rotate it, since a guitar's long neck punishes the smallest tilt.
You also want a ruler, even if you trust your hand. The neck of a guitar is the one place where a tiny wobble shows up loud, and a light ruled line at the start saves you twenty minutes of fixing it later. Keep a small mirror on the desk too. Flipping the image, or your drawing, in a mirror exposes proportion drift you stopped seeing two minutes ago.
Why we break this into nine stages
The construction line method splits a complex object into stages that each ask you to commit to one decision. In stage one you choose where the whole guitar lives on the page. In stage two you decide its angle. Working this way means you never panic in front of a blank sheet, because there is always exactly one thing to do next. It is the same logic behind any still life tutorial that walks you through a teapot or a vase, except the guitar has a longer central axis that needs more discipline.
The nine stages, one by one
Start with the rectangle that the whole guitar will fit inside. Tilt your sketchbook to match the angle of the instrument in your reference photo so your wrist works with the shape, not against it. Lightly mark the top of the headstock and the bottom curve of the lower bout, then connect them with a long vertical axis you can lean on for the rest of the drawing. Keep your pencil pressure light enough that you can erase any of these marks with a brush of your hand.
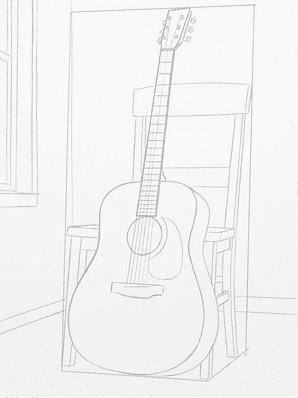
Now divide the envelope. Sketch a flattened figure eight for the body, a long thin rectangle for the neck, and a small angled rectangle for the headstock. Mark where the neck meets the body, which sits around the fourteenth fret on a steel string acoustic. Do not worry about smooth curves yet. Straight, confident lines that miss by a little are easier to correct than fussy curves that lock in the wrong silhouette early. This is the moment that decides whether your guitar reads as a real instrument or a cartoon.
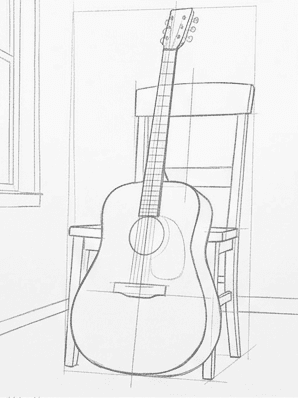
Time to tighten the geometry. Run a horizontal centerline across the body at the level of the soundhole and mark the soundhole as a flat oval, not a circle. Because you are seeing the guitar from a three-quarter view, the top of the ellipse curves down less than the bottom. Place the bridge below the soundhole as a small rectangle. Sketch the line where the saddle sits, since that anchor point controls how the strings angle later. Get your axes right now and the rest of the guitar pencil drawing falls into place almost on its own.
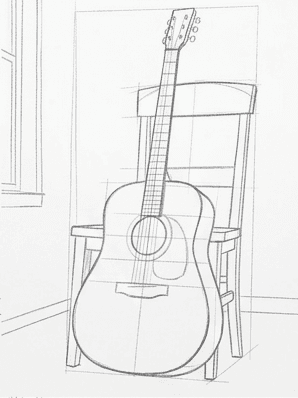
With the skeleton in place, draw the real outline of the body in one slow, confident pass. The waist between the upper and lower bouts is the most beautiful part of any acoustic, and it is also the easiest to flatten if you rush. Follow the curve from the upper shoulder down into the waist, pause, then carry it back out into the wider lower bout. Round the heel where the neck meets the body. Drop the headstock at its angle and place the six tuning pegs as small uniform circles down each side.
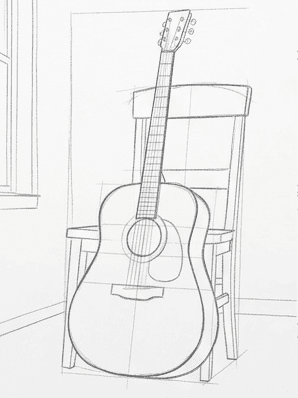
Lift the construction lines with a kneaded eraser using gentle dabs, not strokes. You want a clean silhouette but you also want a faint ghost of the central axis to remain, since it keeps the strings honest in the next stages. Sharpen any line that lost contrast, especially around the headstock and the heel. Step back from the drawing for fifteen seconds and look at it from across the room. A guitar with the right outline reads correctly even at thumbnail size, and any wonky proportions jump out immediately.
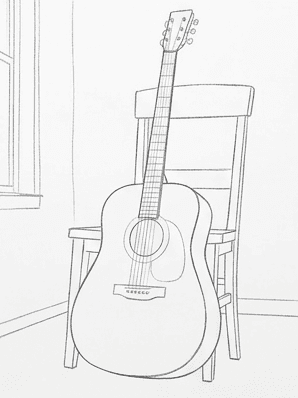
Squint at your reference and map out the major shadow zones with the softest possible outline. The deep shadow inside the soundhole, the cast shadow under the neck where the body curves away, and the darker side of the body where the light falls off are your three priorities. Draw their boundaries as quiet shapes, almost like islands on a map. This is the stage that separates a flat outline from a real musical instrument sketch with weight and gravity.
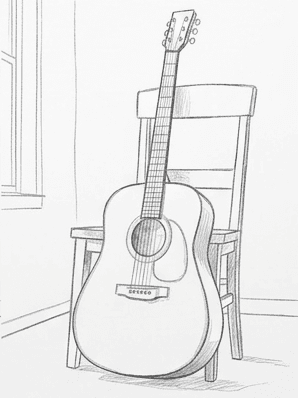
Switch to your HB or 2B and start hatching inside the shadow shapes you just outlined. Keep your strokes parallel and follow the form, which means curving them gently around the lower bout and laying them flat along the neck. Build one layer at a time. Two thin layers always read cleaner than one heavy layer, and you can adjust contrast as you go. The soundhole gets the darkest treatment first since its interior is essentially black.
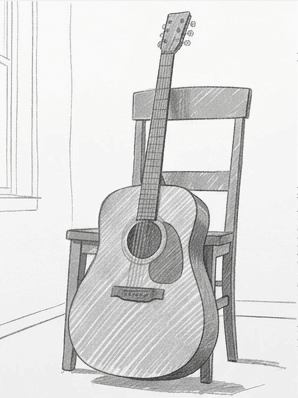
Now lay in the middle values that connect light and shadow. The top surface of the guitar body picks up a soft halftone across the lower bout because the light slides off as the form turns. Add a quiet background shadow on the side opposite the light, just enough to push the guitar forward. Keep these halftones lighter than you think you need. You can always darken later, but lifting graphite from a flooded area is the single hardest thing to do in pencil.
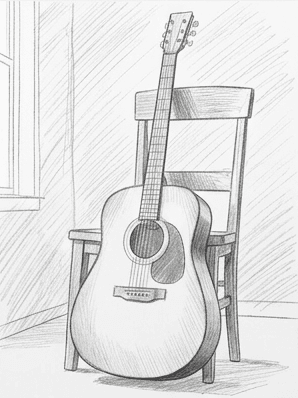
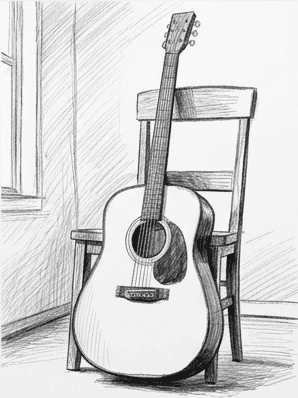
Finish with your 4B or 6B and push the deepest darks. The interior of the soundhole, the slot between the bridge and the strings, and the cast shadow under the heel all need a true black to anchor the drawing. Sharpen the silhouette where it meets the background by laying one decisive line along the edge. Use the plastic eraser to lift two or three bright reflections on the body and the polished tuning pegs. These small highlights are the difference between a competent draw a guitar step by step exercise and a portrait that looks alive.
Common mistakes
A handful of slips trip up almost every beginner on a first guitar drawing. Catch them early and your second attempt looks twice as good.
The most common mistake is a tilted neck. The angle of the neck should match the angle of the body axis exactly. If the neck wanders even a few degrees, the whole instrument looks broken. Hold your drawing up to a mirror, or photograph it on your phone and flip the image, to see the drift instantly. Fix it before you commit to any shading.
The second mistake is a perfectly round soundhole. In a three-quarter view the soundhole is always an ellipse, never a circle. If yours looks circular, the body has flattened too. Push the rear edge of the ellipse back toward the bridge until you can see the perspective work for you, not against you.
The third mistake is uneven tuning pegs. The six pegs should sit at consistent intervals down each side of the headstock, and their spacing usually matches the string spacing at the nut. Draw a light ruled line down each side of the headstock to keep them anchored. A peg that floats half a millimeter out of line is the kind of detail your eye catches without knowing why.
The fourth mistake is overworked shading. Beginners almost always reach for the dark pencil too early and flatten their drawing into mud. Hold off on your 4B until stage nine. Until then, every dark you place should still allow the paper to breathe through the strokes. If you can no longer see your hatching direction, you have gone too far. Lift with a kneaded eraser and rebuild.
Practice prompts
For the first follow-up, try a flat front view of the same guitar instead of a three-quarter view. The body becomes a clean symmetric figure eight and the soundhole is a real circle. This forces you to be honest about your bilateral symmetry, since any mistake on the left half is now mirrored on the right.
For the second prompt, draw an electric guitar instead. The body is solid, the headstock is usually wider, and the cutaway shape on the upper bout adds a useful curve to study. The same nine stages still apply, only the proportions change. You will be surprised how transferable the construction method is across instruments.
For the third prompt, take a photo of your own acoustic guitar at home in late afternoon light, then redraw it from your photo rather than a stock reference. Drawing something familiar trains your eye to spot the proportions you would otherwise rationalize away.
You now have a complete workflow for any acoustic guitar drawing: envelope, sub-shapes, ellipse axes, clean outline, shadow shapes, hatching, halftones, and final darks. The same nine-stage logic carries over to almost any object you draw next. If you want this breakdown applied to your own photos, the Learn to Draw app for iOS and Android turns any picture you snap into a guided pencil tutorial that uses the same construction line method.

