How to Draw a Kitten in Watercolor: A Loose Ink and Wash Tutorial
Learn how to draw a kitten in watercolor with a relaxed nine-stage progression that handles soft fur, big eyes, and gentle washes step by step.
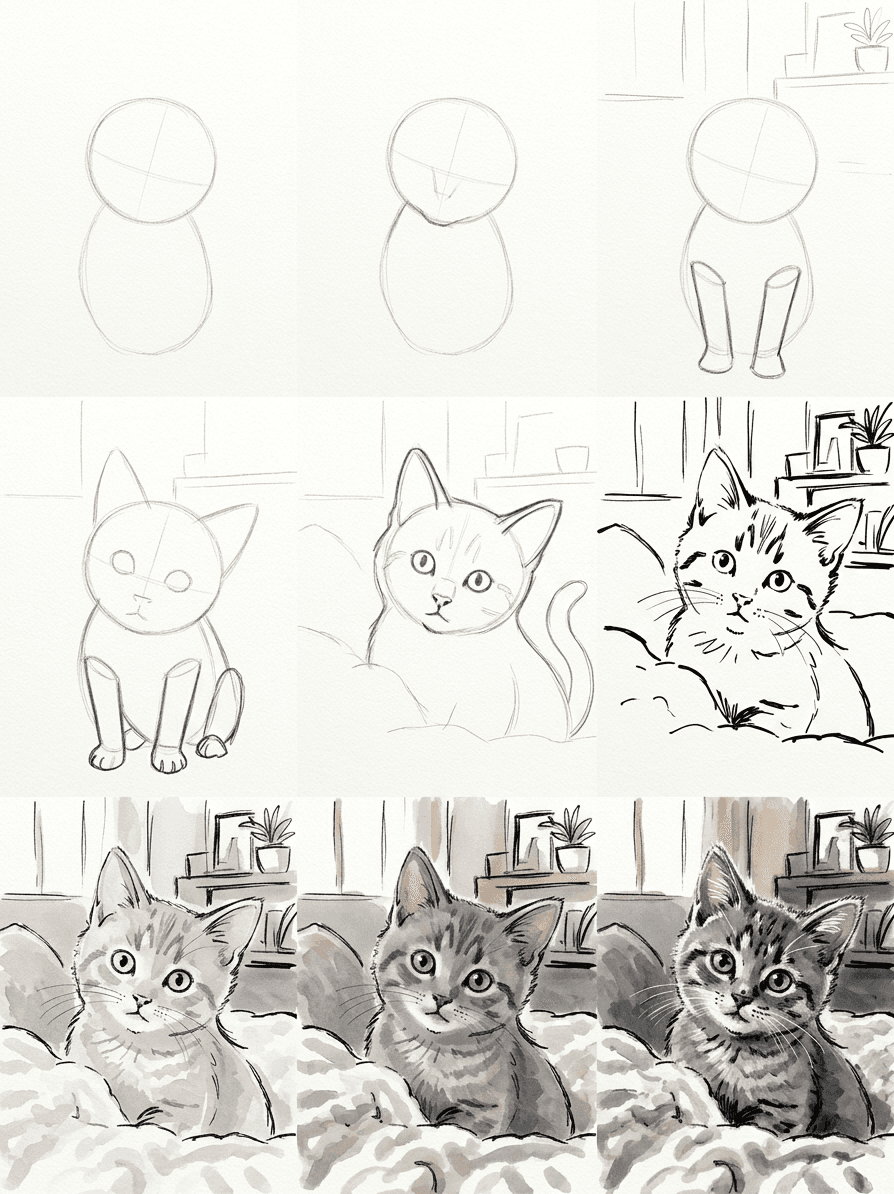
A small kitten is one of the friendliest beginner subjects you can pick for an easy cat painting. The shapes are soft, the proportions forgive small errors, and a loose watercolor approach hides every wobble in your line. This kitten watercolor tutorial walks you through how to draw a kitten in watercolor across nine clear stages, starting with light pencil masses and finishing with quick ink accents over washes of warm grey. Spend an hour with it and you will leave with a finished piece you would happily tape to the fridge.
What you will need
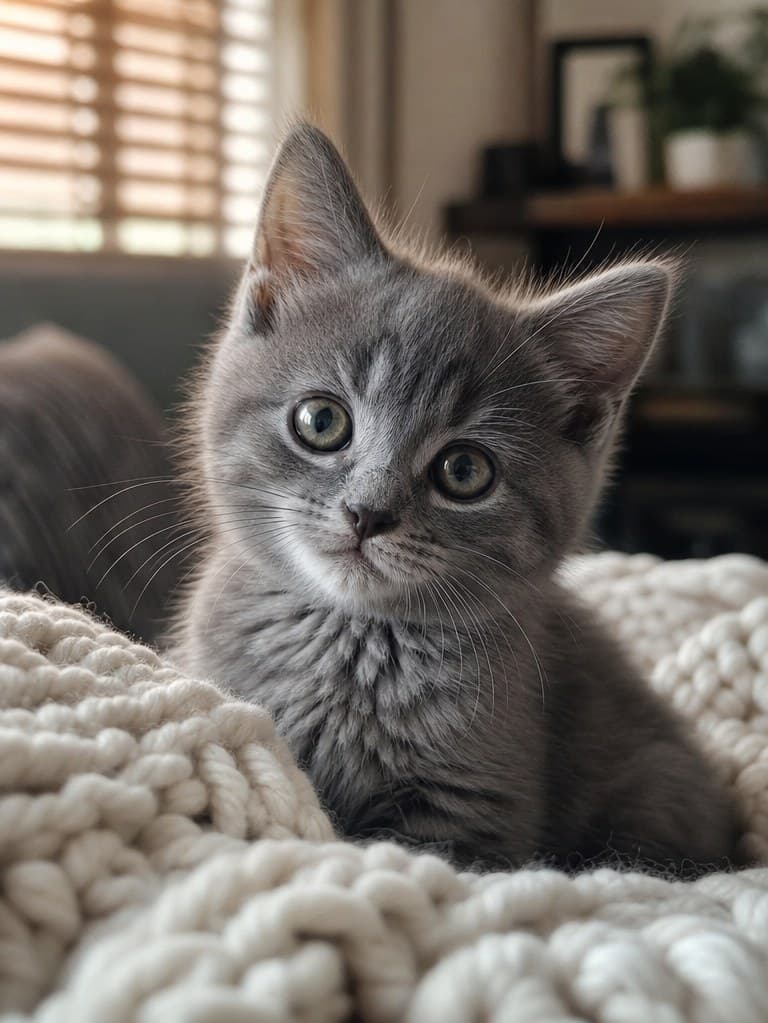
You can draw this kitten with whatever paper and brushes you already own. A pad of cold press watercolor paper around 200 gsm is ideal because it handles a few washes without buckling. For drawing, an HB pencil for the layout, a kneaded eraser, and a fine waterproof pen around 0.3 mm for the inking. For paint, a small palette of warm grey, raw umber, and a touch of pink ochre will cover everything you see in the reference.
A round watercolor brush in size 6 or 8 plus a smaller size 2 for the eyes and whiskers gives you all the control you need. Two jars of water, one for rinsing and one for clean mixes, helps your colors stay bright. A folded paper towel handles any drips. If you usually paint on an iPad, the same workflow works inside any procedural app, so swap the brushes for soft round and dry brush presets and keep going.
Why we break this into nine stages
A loose ink and wash kitten looks effortless once finished, yet most beginners skip the structure and end up with a flat blob. Splitting the build into nine small steps keeps your construction lines visible until they have done their job, then lets the watercolor do the heavy lifting at the end. Each stage answers one specific question, which means you can pause anywhere, walk away for a coffee, and pick the kitten back up without losing your place.
Stage 1: lay the body and head masses
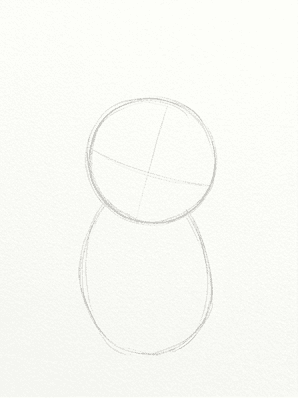
Start with two soft ovals on the page. Draw a larger oval for the chest and stack a smaller round one above it for the head. Place the head slightly forward of the chest so the kitten reads as alert rather than slumped over its paws. Keep your pencil lighter than you think it should be, because every mark in this stage will be erased the moment the ink dries in stage six.
Stage 2: link the neck and place the muzzle
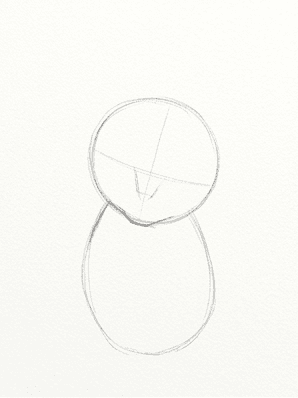
Draw a short tapered curve linking the head and chest masses on each side. That short curve becomes the soft kitten neck and disappears under fur in the final pass. Then drop a small triangle centered on the lower half of the head for the muzzle. The muzzle pins the eye line and tells you exactly where the nose belongs.
Stage 3: draw the front limbs
Sketch two narrow tubes coming straight down from the chest, ending in soft circles for the front paws. Kittens sit with their forelegs almost vertical, which makes them much easier to plot than an adult cat in profile. Keep both legs the same length even if the pose hides the far paw, because guessing will introduce a lean you do not want.
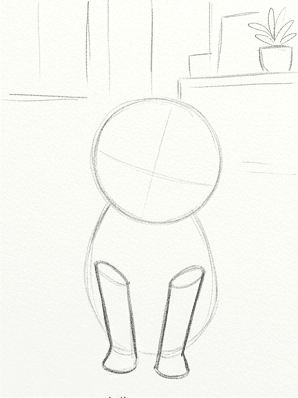
Stage 4: tuck in the back limbs
Tuck a curving wedge under the chest on each side for the folded back legs. The thigh sits high under the body and the back paw rests near the front feet. This is the stage where small kittens look most kitten-like, with the body packed compact, so fight the urge to tighten the line and just trust the shapes.
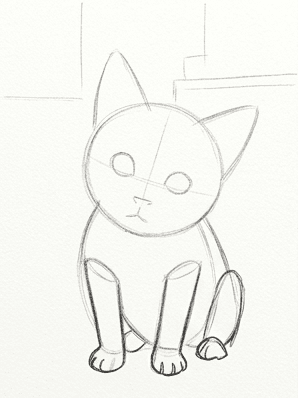
Stage 5: add ears, tail, and the fur contour
Top the head with two open triangles for the ears, slightly leaned outward. Sweep a soft tail curling around one paw, since a tucked tail almost always reads cuter than a flicked one. Then trace a feather-light contour around the whole body to mark where the fur breaks over the underlying shapes you laid down.
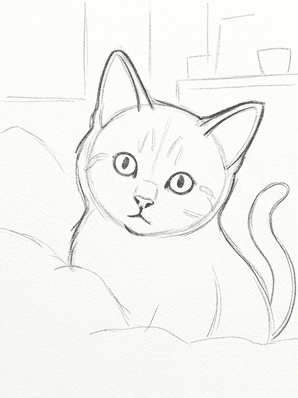
Stage 6: ink the keepers, erase the rest
Take your fineliner and trace only the contours you actually want to keep in the final piece. Vary the pressure as you go so the line is heavier under the chin and lighter along the back. Once the ink is dry to the touch, erase every single pencil mark in one steady pass with the kneaded eraser.
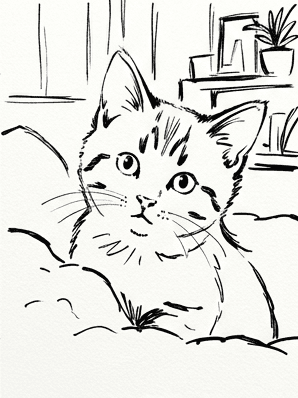
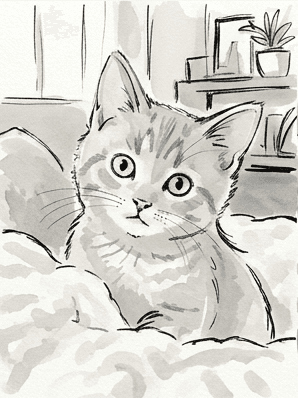
Stage 7: lay the palest wash
Wet a clean area of paper across the body and float a very dilute warm grey over the entire fur. Leave the chest and the area above the eyes paper white, because those untouched spots will read as the brightest highlights in the finished piece. Let the wash dry fully before moving on, since rushing this drying step is the fastest way to bloom a wash you cannot fix.
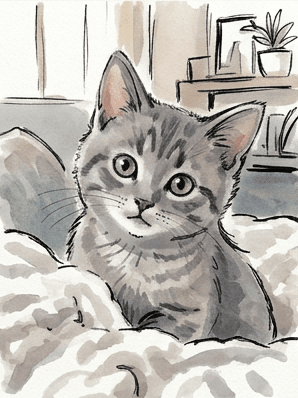
Stage 8: build the mid tone color
Mix a slightly stronger grey with a touch of raw umber and brush it into the back, the side of the face, and the haunches. Keep your edges soft by tilting the paper or pulling clean water along the hard line as you go. Drop in a touch of pink ochre for the inner ears and the nose so the face does not feel cold.
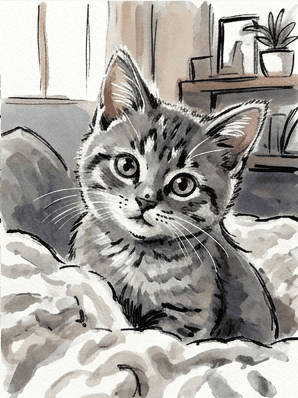
Stage 9: deepen shadows with ink accents
Bring the size 2 brush back with a darker grey and sink the deepest shadows under the chin, behind the front legs, and inside the ears. Finish with a few quick fineliner ticks for whiskers, eyelash hints, and a few stray fur tufts on the chest. Stop while it still feels loose. The painting is done when you would feel a little sad to add another mark.
Common mistakes
Most beginners stumble in three predictable places when learning a kitten in loose ink and wash. Catch these now and the next attempt will jump in quality without any extra reference work.
The first mistake is making the head as wide as the body. A kitten's head reads small relative to a fluffy body, even when fluff doubles the apparent volume. If the head is creeping past the chest in width, shrink the head and add a fur cloud to the chest instead.
The second mistake is overworking the eyes. Big round eyes carry most of the charm, but two thick black circles read like beetles glued to the face. Keep the iris soft and reserve the darkest ink for a small pupil and one upper lid line per eye.
The third mistake is muddy color. Loose ink and watercolor lives or dies by clean water. The moment your brush water turns brown, swap it. The moment your wash starts to look soupy, stop and let it dry. You can always add another pass later, but you cannot lift a heavy stain once it sets.
A fourth, smaller pitfall is symmetry. Twin ears at exactly the same angle, twin paws at exactly the same height, and a perfectly centered tail all telegraph beginner work. Nudge one detail off and the whole piece relaxes into a real animal. The fifth and final pitfall is starting in ink. Pencil first, always.
Practice prompts
Once today's drawing dries, try one of these short follow-on studies to lock in the muscle memory while the workflow is still fresh in your hands. None of them needs another full hour, but each one teaches a different lesson.
First, draw the same kitten in profile, looking to the right. The body shapes barely change but the muzzle now sits at the side of the head, which forces you to rethink the eye line and the placement of the far ear.
Second, try a black kitten on the same blanket. Strip the wash work back to a single dark wash plus a hard ink shadow under the chin. You will learn quickly how much value a single confident wash can carry.
Third, swap the kitten for a smaller subject, such as a paw resting on a wrist or a curled tail on a cushion. Tiny studies build observation skills faster than another full pose, and they fit on the corner of any sketchbook page. If you want to draw a baby cat step by step from your own phone photos rather than a generated reference, the same nine stage map works without any change.
A kitten in watercolor is one of those drawings that looks much harder than it is once you see the bones underneath. Repeat this nine-stage sequence on a different reference next week and the whole pipeline will feel automatic by the end of the month. If you want to run this exact workflow on your own pet photos with the construction lines drawn for you, the Learn to Draw iOS and Android app handles every step from reference to final wash, so you can focus on the brush in your hand.

